

|
Grill
|
|||||||||||
| Home | I did not think the construction of the grill was of much interest, so I did not take too many pictures of it construction. But, posts on web sites have proven it to be of interest, so I have included it here.
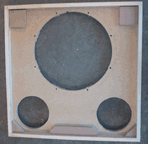
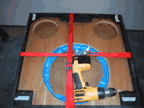
I used some 5/8 thick popular stock I had on hand. 3/4 could be used as well. I was just concerned about the weight of the grill, so used popular which is strong and light. In order to clear the driver at the edge, I had to remove 5/8 inch of the grill frame for about six inches. This lead me to make the grill frame 1 1/4 inches thick, leaving 1/2 inch of full strength frame plus the 1/4 inch or so at the point of the driver. This made the frame strong enough in my opinion. So the frame was made of 5/8 by 1 1/4 popular. I made finger joints (2/3 fingers) for the corners and added blocks of MDF at the top and wedges at the bottom, making sure they did not interfere with the ports. In addition I put a stiffened on the bottom which turned out to be not required( I had not used the grill guides before and was not certain if they could hold the weight). I made sure that the grill frame was square when I glued, measuring the diagonals to make sure they were equal. Once the glue set, I used a 1/2 round over bit on the router to round over the outside edges of the grill on the front only. I then painted the grill black. Once this was done, I used a Dremel tool with a sanding disk to remove the frame material where the driver was. I then drilled the grill frame and box, inserted the grill guides, then attached the grill cloth. To attached the grill cloth I used a 3M product called 77 Spray Adhesive. This was done by laying the frame on the grill cloth, protecting with plastic and tape those surfaces that was not to be glued and then spraying on the cloth and grill and then the cloth was attached to the grill. This product sets in a few seconds. I then cut the excess cloth off with a knife. |
||||||||||
| The glued grill laying on top of the bottom piece. Note the MDF pieces at the corners | |||||||||||
| Grill guides. The socket uses a 9/16 inch hole 1/2 inch deep and gets interested into the box. The plug uses a 7/16 inch hole 1/2 inch deep and gets inserted into the grill. | |||||||||||
| The grill is clamped to the box and aligned the way you want the grill to fit the opening. You then drill a pilot hole through the MDF block and wedges at the four corners but only about 1/2 inch into the box.
Then you drill a 9/16 inch hole 1/2 inch deep into the box at the four corners where the pilot holes are. You drill 7/16 inch holes 1/2 inch deep in the back side of the grill where the pilot holes are in the MDF in the corners. You then gently knock the grill guides into place. The use of the pilot holes ensures a good registration of the grill on the box. |
|||||||||||
| Copyright 2005, Trtinkerer | |||||||||||