Odds and Ends
This page is devoted to odd little things that I have tried or found out the hard way that worked for me. I will add on to this page as time goes on.
DOOR PANEL FASTNERS AND PRESSBOARD
 The fasteners that hold the door panel to the door will eat the oblong hole out of the pressboard if not removed correctly. Or the metal retainer on the upper part of the door panel has pulled loose. A quick fix for this is a hot glue gun. The glue sets up quickly to make for speedy repairs.
DOOR WATER SHIELDS
 After doing repair work on your door, most of the time the water shield is beyond repair. I do not know why someone does not reproduce this item. Go to the hardware store and buy a piece of thick plastic (4 mil). Use the old water shield as a pattern. I used DAP Household Adhesive to attach the plastic to the door (a little tape also helps until the glue can setup). Now install your door panel.
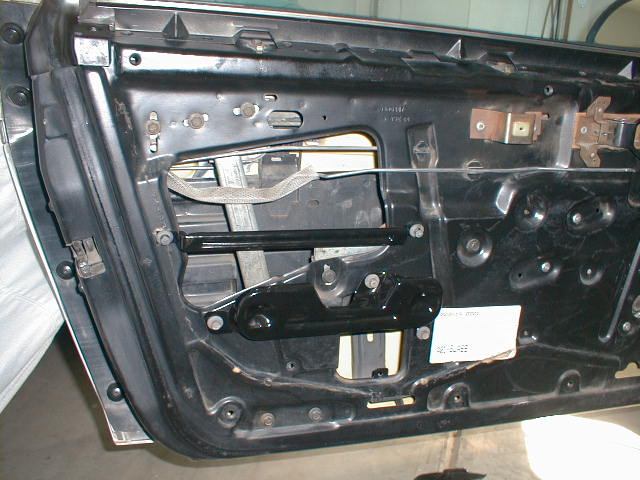
REPLACING THE DOOR STRIKER BOLTS
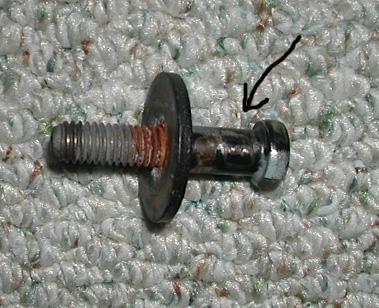
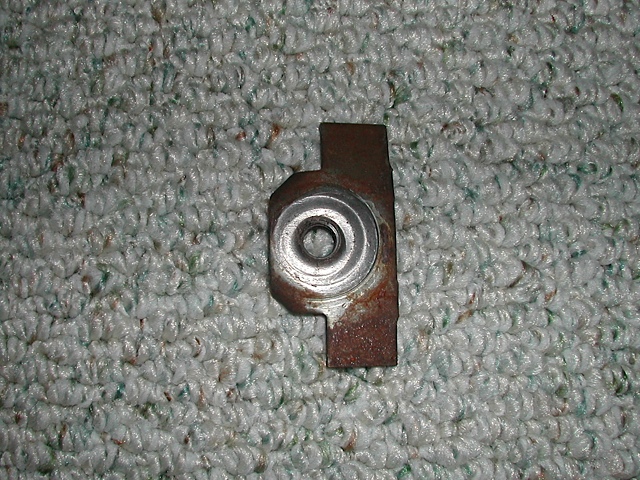
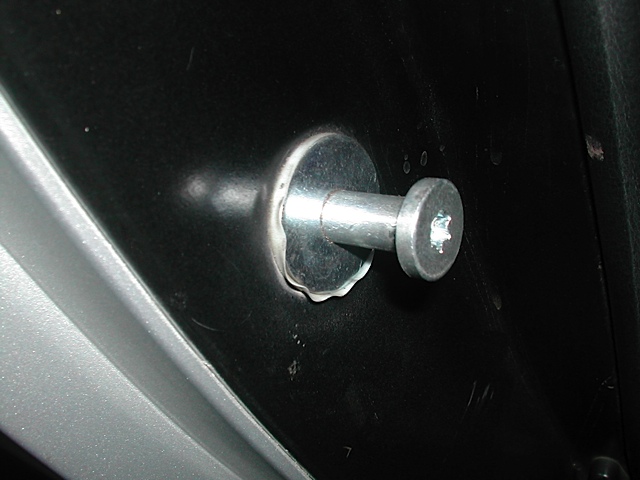
How to eliminate the rattles from the doors. Worn door striker bolts can cause the rattles in your dor. The ware does not have to be much. On my old striker bolts were only worn down about .020. In the help section at your local auto supply store look for part number 38421 "DOOR STRIKER BOLT".
Using a T-45 TorkX socket and remove the old door striker bolt. Hopefully it will un-screw easly. If to much force is applied the tabs that hold the plate in behind the door jam will bend. Once the old striker bolt is loose pull the bolt toward you while un-screwing the bolt, this will hold the backing plate in position. Once the striker bolt is out insert the new striker bolt gently and start threading it into the backing plate. If the backing plate falls the world has not come to an end. Remove the interior pice covering the "B" piller and remove the air vent duct located in the "B" piller. Now you can reach the backing plate and reinsert it back in the tabs it fell out of.
HOW YOUR OIL PRESSUR SENSOR WORKS
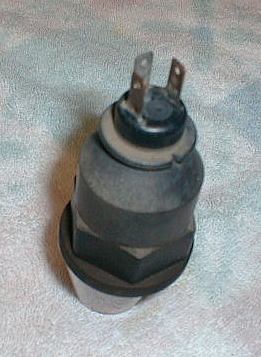
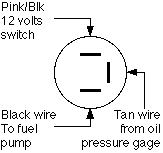 The oil pressure sensor does two jobs. It acts as a switch for the fuel pump and provides a resistance as the oil pressure increases or deceases. If you turn your key on and your oil pressure reading is above zero make this check. Don't let the large hex shape on the outer cover fool you, it's not designed to be used for loosening or tightening the sender, there's a smaller metal one on the bottom. Use that. To get the connector off the top you have to squeeze the ring enough to get the teeth to clear the raised edge around the top of the sender. Remove the plug on the oil pressure sensor, use an ohms meter (use the 0 to 2K setting) and measure from the oil pressure tab on the sensor to ground. This should read 0; any reading above 0 will give you an indication on the gauge. If it reads open it is bad and will peg the needle when you turn the key to the on position. There have been reports of reading zero but once pressure is applied the gauge will peg out. The only fix is to replace the sensor.
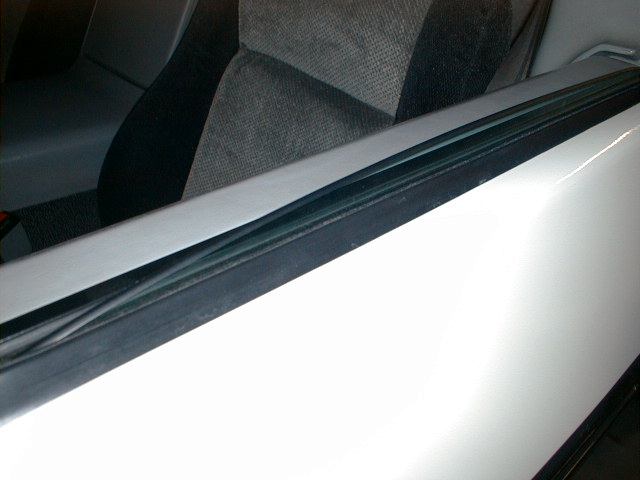
DEW WIPES
The inside wipes are the easy ones to change out, but those are not the ones that ever go bad. The outside wipes are the ones that crack and dry out. To replace the outside wipes be prepared for a few days of hard work. Start by removing the inside door panel and the rubber seal at the front and rear of the window. Remove the water shield. Move the window into a position so you can drill out the four (4) rivets that hold the window in place. These rivets are hard to drill out if the center steel pin is still in place. Use a small drift punch and tap lightly until the pin releases. This gives you a pilot hole for a 1/4" drill to follow. Remove the nylon stops and lift the window out carefully, it can be scratched. Now you have access to the screws that hold the dew wipe in place. When you put the window back together use 1/4" nuts and bolts, then use a self locking nut or Locktight to keep the nut from comming off in 10,000 miles. Another way to help this project is to remove the door skin, but that would be another two day project.
88 FRONT SPRING INSTALLATION
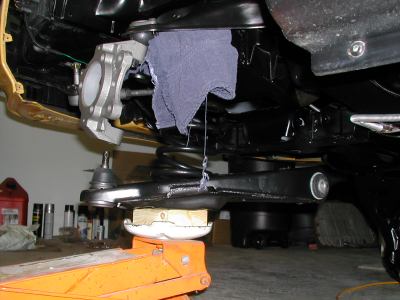
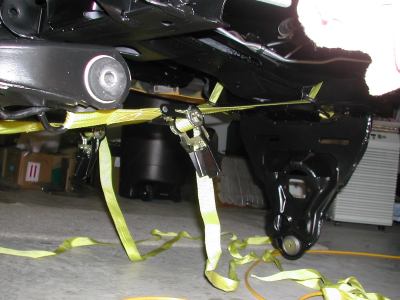
First things first, SAFETY is important. Work slowly and carefully, if something does not look right, stop and see what is wrong. I also recommend putting a cable or rope down through the shock tower, spring, lower control arm and securing it. Watch were you put your hands, I know you have two of them and I want you the keep both of them.I took the lower control arm (LCA) off and put the spring in the LCA. Make sure you have the spring seated correctly in the bottom of the LCA. Then held the top in place with a little pressure from the hydraulic jack. Then I used 2 tie down straps from the LCA to the other side of the car to keep it from pulling away (the angle of the spring wants to push the LCA away from the car).

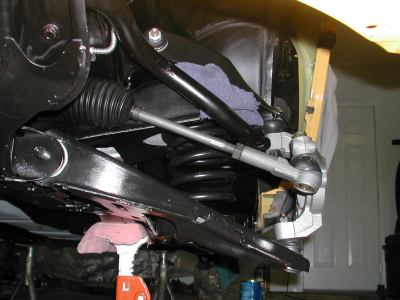 I compressed the spring about half way. Then I attach the spindle. Keep adjusting the straps so the bushings are going to line up with area they must slide into. Make sure your hydraulic jack moves with the LCA. As you raise the hydraulic jack, about half way up the upper control arm will start to raise. I also saw that the back part of the LCA stops moving in the upward direction. I then used a scissor jack to push the back of the LCA up so I could align the holes for the 2 LCA bolts. A big screw driver helps to align the bushing hole to the ears on the frame. Once again, work SAFE.
REPLACING HEAD REST SPEAKERS

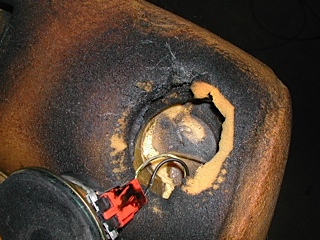
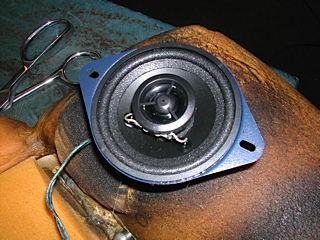
Replacing the speakers in my 85 SE I choose the Clearwater 3-1/2" speakers that are made for the Miata. These speakers cost a little more but got the highest recommendations from other Frier owners. The first picture shows the original speaker being removed from the headrest. In the second picture note the plug used to connect the wiring to the speaker. Note the plug has a "A" and "B" marking, the "A" wire is ground and the "B" wire is plus. Depending on the Left or Right speaker you are working on the BROWN and DARK BLUE wires are the plus side. Remove the speaker plug from the original wiring harness. The Miata speakers use a narrow and a wide spade to connect the wire to the speaker. Cut about 2" off the Miata wiring harness and splice them onto the Fiero speaker harness, BROWN and DARK BLUE wires getting the wide spades. Use heat shrink tibing to protect your splice. Now tuck the new speaker down into the foam padding and I recommend testing the speakers before putting the seat cover on.
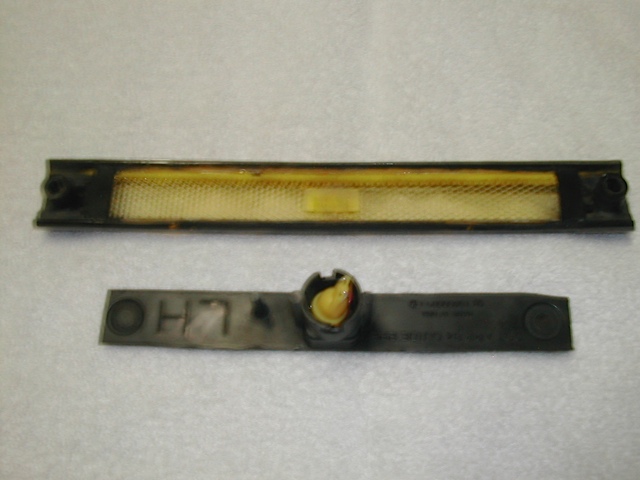
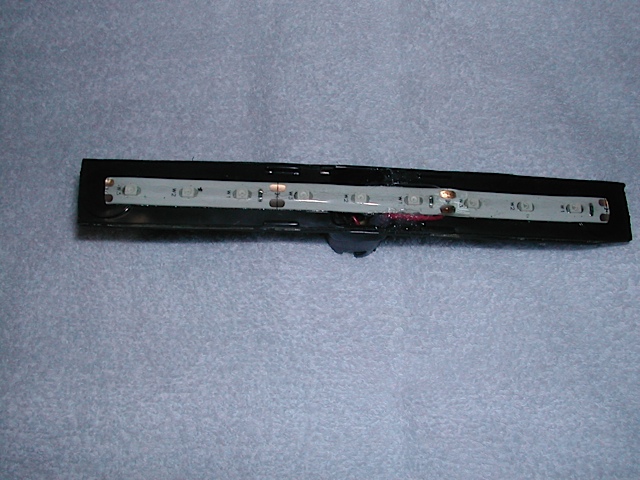
LEDs FOR YOUR SIDE MARKERS LIGHT
I bought the LED side marker kit from Danyel out of Canada. I have the ribbed side markers and ran into a small problem when I tried to install them. If you have the round side marker lights you will not have this problem. First I tried Danyel's way by using a box cutter and then a little heat to separate the backing from the lens, but they would not come apart. Then I went to Tony's way and cut an opening to one side where the lightbulb was installed on a yellow-ribbed side marker. With access I found that there is not enough room to slide the LED into the side marker. I had to remove (cut) the entire back from the side marker. Now you can place the LEDs on the backing plate. Make sure you center the LEDs on the backing plate.
You will find that when you go to glue the backing plate onto the lens it will not seat back in its original place, but it comes close. I used a piece of masking tape on both ends to hold the 2 pieces together tightly. Then I used the fast setting JB Weld to glue it together. When I cut the red-ribbed side marker open I found there is a little more room between the backing plate and the lens. I think it was easier for me to just remove the whole backing plate for LED installation.
