
Ford Super Duty 4x4 CB Antenna Installation
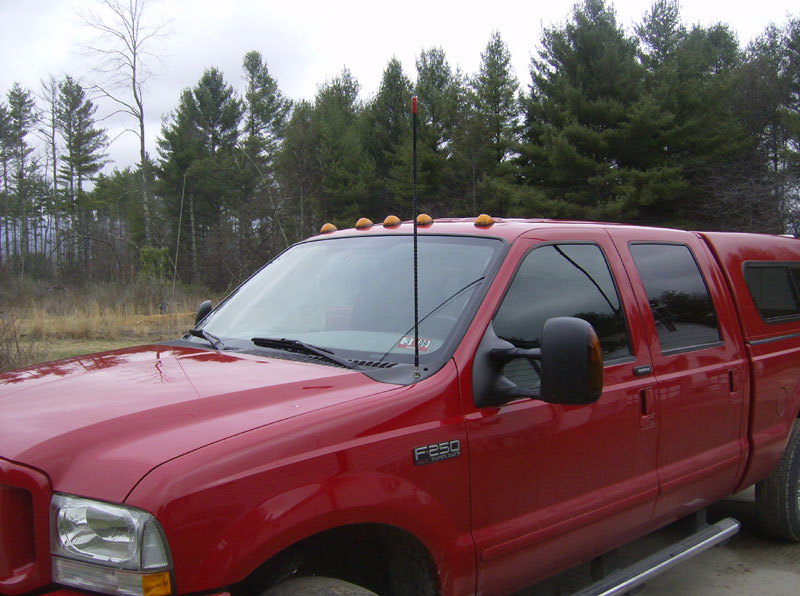
2004 F250 4x4 XLT Sport
Click Here for a PDF version of this article
I wanted to install a CB in my truck but I didn't particularly like any of the typical antenna installation options. I didn't want to run a magnetic mount antenna or a "through the glass" antenna. I also didn't want to drill any holes in the roof, bed, or fenders. I ended up finding a solution on the Ford Truck Enthusiasts forum that KenReb came up with. I figured I would put up a few pics and explanation for those who would like to do this. This install is not that hard but its not that easy either.
I really like the location on the driver's side cowl because it makes for a really clean install without having to drill into the fender, roof, or bed. I figured if I screwed up drilling the plastic cowl piece I could just buy another one somewhere and replace it, as opposed to replacing (and paint matching!) a fender or patching a hole in the roof.
I chose the Firestik stake hole mount kit for a couple reasons. First, because it was my second preference for installing the antenna so I figured if the cowl install didn't pan out, I could back off and install it in the stake hole, with some slight mods since I have a camper top. Firestik does make an extended stake hole mount specifically for camper top/tonneau cover applications, but not in the mini kit. The other reason I bought this mounting kit was that it contained the antenna mount I needed and the length of coax with the FireRing connector.
There's a wealth of CB/Antenna tech info on Firestik's tech page.
Tools
& Parts I Used
- Firestik antenna mount mini kit part number MK294-R
- Firestik II 3-foot black antenna part number FS3-B
- Phillips screwdriver
- Flat screwdriver
- Needlenose pliers
- 1/2" open end wrench
- 9/16 open end wrench
- 5/8" open end wrench
- Small adjustable wrench
- Tape measure and/or digital calipers
- Drill
- Drill bit set ranging from 1/8" up to 1/2"
- 7/8" hole saw
- 3/8" drive ratchet
- 3/8" drive, 6 inch extension
- 3/8" drive, 13mm socket
- 6-32 x 1/2" socket head cap screw, flat washer, lock washer
- 6-32 tap
- 8-32 x 1" machine screw, flatwasher, locknut
- 7/64" allen wrench
- Dremel tool with cutoff wheel
- Soldering iron and solder
- Small round file
- Wire stripping tool
- Xacto knife
- Digital voltmeter
- Minor fab skills
Procedure
The first step is to remove the cowl pieces on the both sides. Removing the passenger side is not really necessary but I removed it so I could measure the radio antenna location so that the CB antenna would be roughly in the same spot, on the opposite side.

To remove the cowl pieces you must first remove the wiper blades. Then remove 8 phillips head screws (4 on each side) across the top of the cowl.
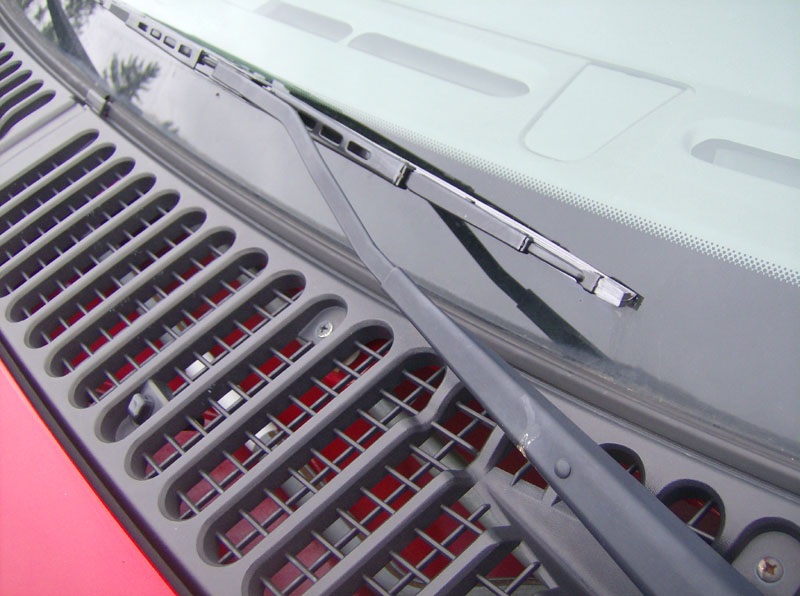
Next, raise the hood and remove the 6 plastic clips, that hold a wiring harness in place, along the front edge of the cowl. Then remove the weatherstrip by simply lifting it off.
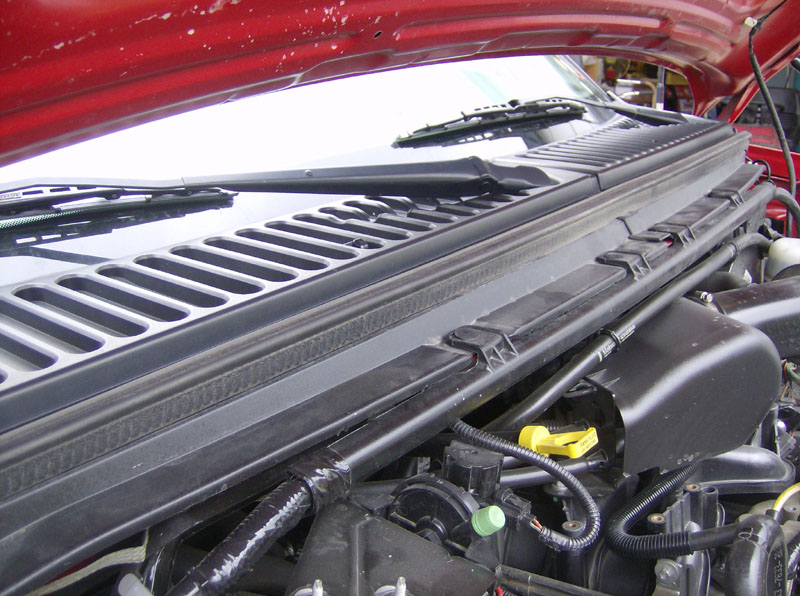
Now lift the cowl pieces up and pull the washer fluid tubing off of the sprayers. Then the cowl pieces can be removed. The picture below shows a good place to disconnect the passenger side tube. There is a similar connection for the driver side cowl piece, that you access after lifting the cowl piece up.
Unfortunately, I don't have any good pictures of the next few steps because I decided to write this article after I had already installed the mount.
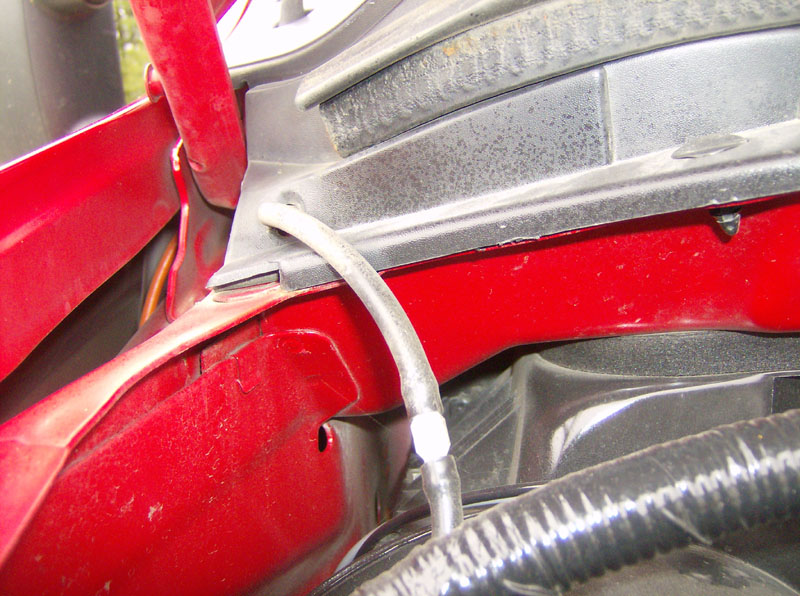
Now you can see the metal piece where you will install the antenna mount. From the factory, this piece slopes downward. For the antenna mount, you must use pliers or a small adjustable wrench to tweak the metal piece around until the antenna will be straight and square. You just need to get this adjustment close at this point because you can adjust the antenna around until its straight and square after its installed.
The next thing I did was take some measurements of the radio antenna location to try to position the CB antenna mount in roughly the same place, on the opposite side. I started by drilling a small pilot hole, then worked my way up to the 1/2" hole required by the antenna mount.
Next, I installed the antenna mount per the instructions from Firestik.
Image courtesy of the Firestik
Antenna Company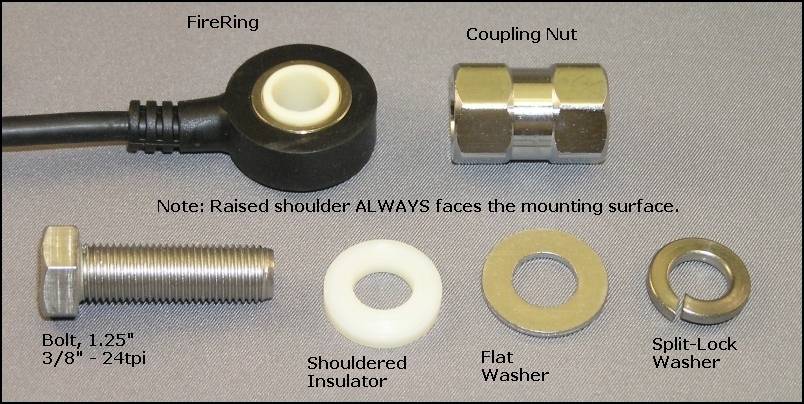
Image courtesy of the Firestik
Antenna Company 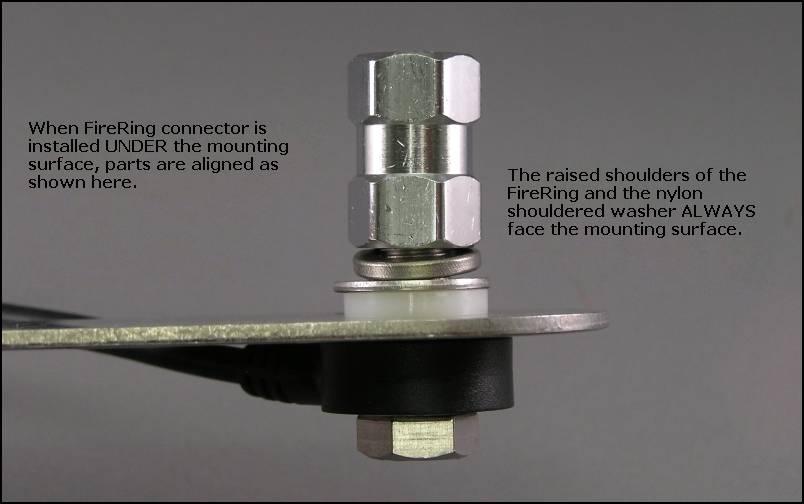
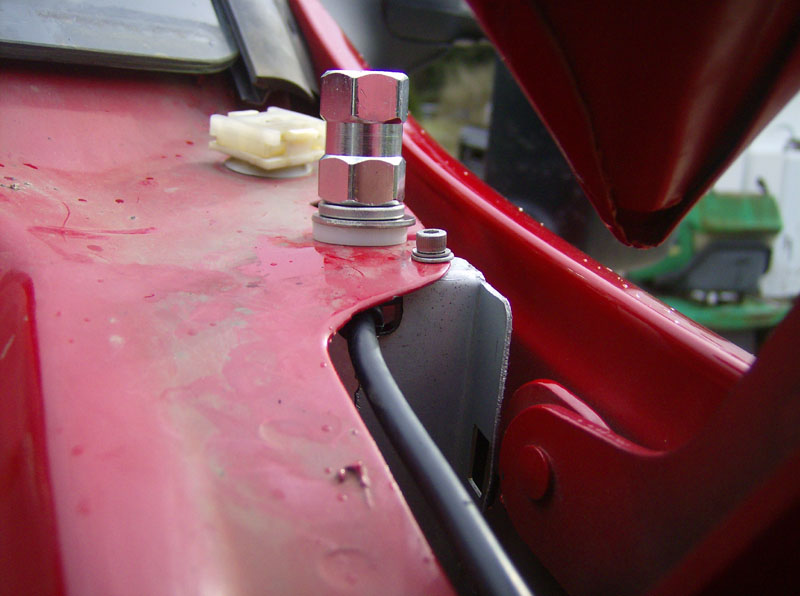
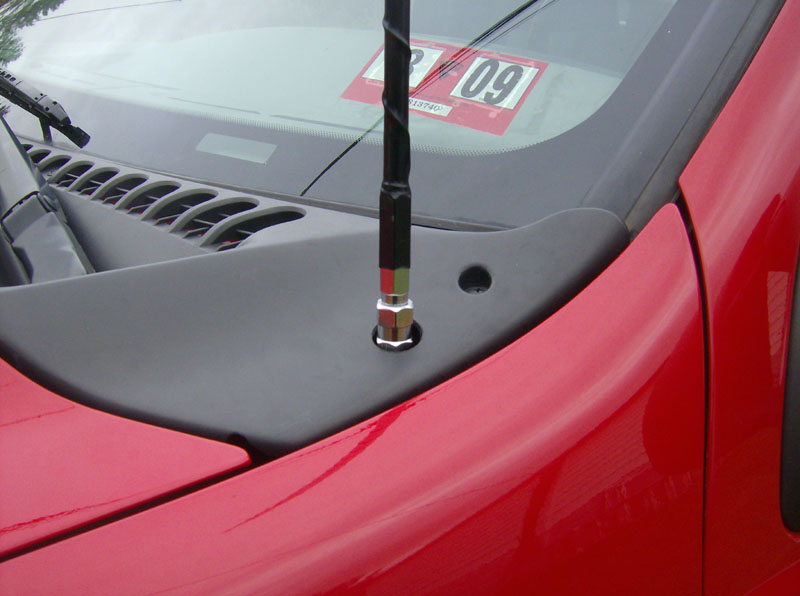
Here you can see the mount after installation
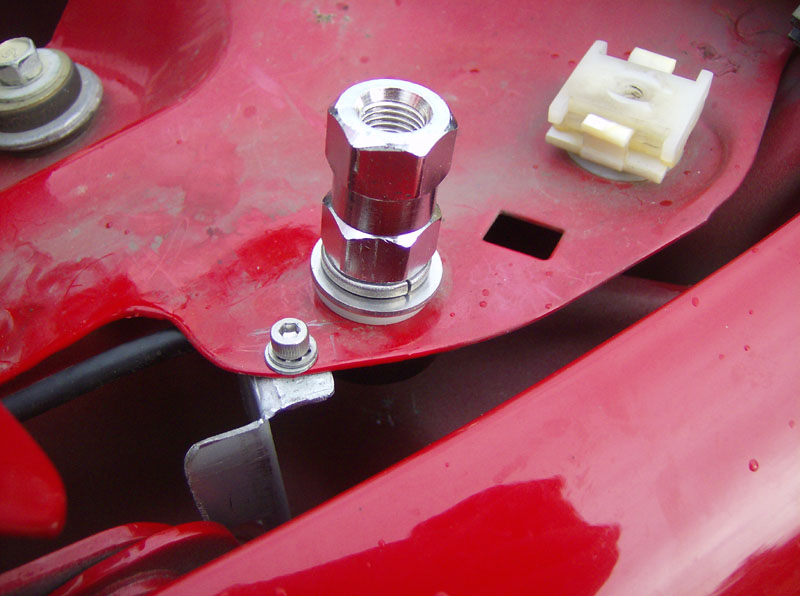
This piece of metal is fairly thin and the antenna is fairly heavy. That, plus the force on the antenna from the wind while driving, led me to install a brace at the front corner. I fabbed up an angle bracket to stiffen it up a little. The bracket connects at the bottom under the rear most hood hinge mount hole. I drilled a 9/64" hole near the antenna mount, then match-drilled the top part of the bracket so the holes would line up. I tapped the bracket to fit the 6-32 threads of the small screw I used. Tapping is optional as I could've also used a nut on the bottom side.
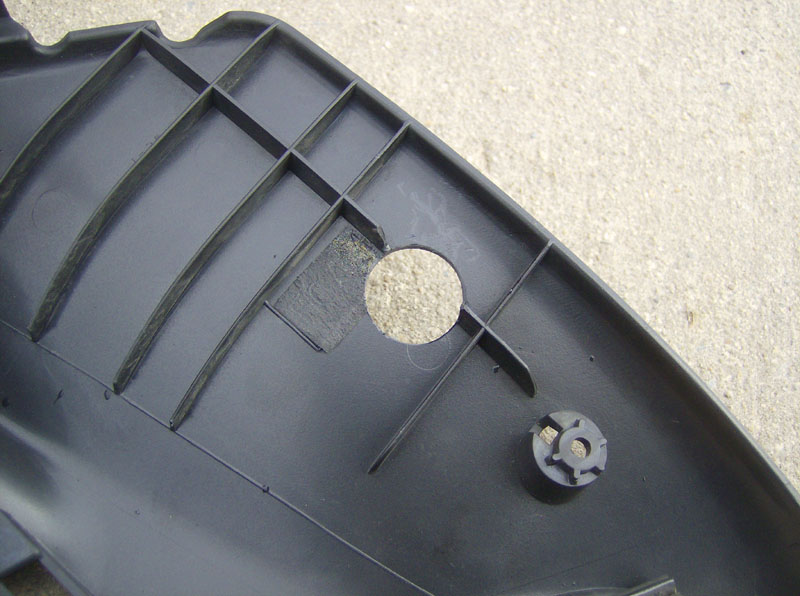
The next step is the important one! I don't have much advice other than to measure and test fit a bunch times before drilling the hole in the cowl. I must have test fit the cowl piece 20 times before finally drilling it with the 7/8" holesaw. I first used a dremel tool to remove the rib that crosses right where the hole needs to be. Then I put a little white paint on the top of the mount to help mark where the hole needed to go. Then the series of test fits and finally drilled the hole.

Now that the hard part is over with, its time to reinstall the cowl pieces with these steps:
Reconnect the washer fluid tubes
Place the cowl pieces where they go
Reinstall the weather strip piece
Reinstall the 8 phillips head screws on the top of the cowl
Reinstall the wiper blades.
Reinstall 5 of the mounting clips across the front edge of the cowl. Do not install the outer most one on the driver's side, you'll see why below.
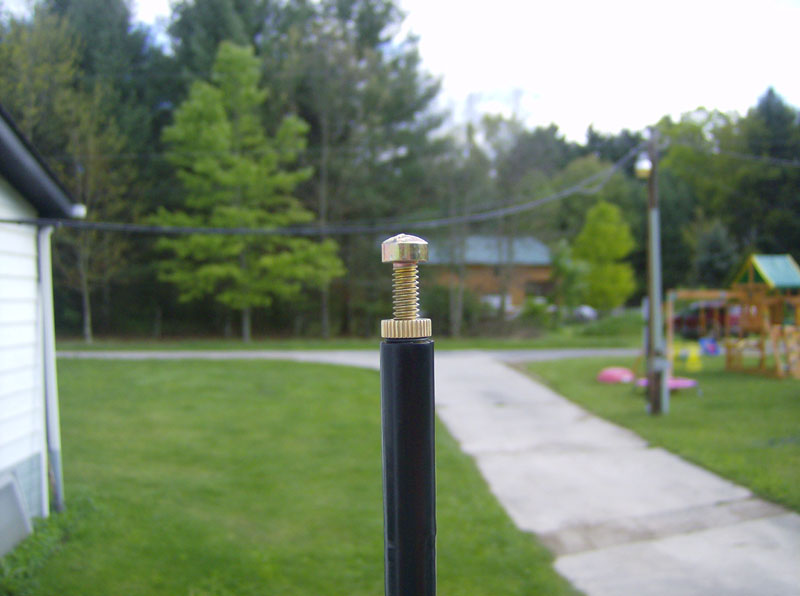
Next, install the antenna into the mount and gently bend around on the antenna mount until the antenna is straight and square with the truck.
Now it is time to finish the coax cable installation. The first thing I did was use a small round file to file away some of the plastic on the cowl piece, to allow the coax to lay safely out of the way of the hood hinge.
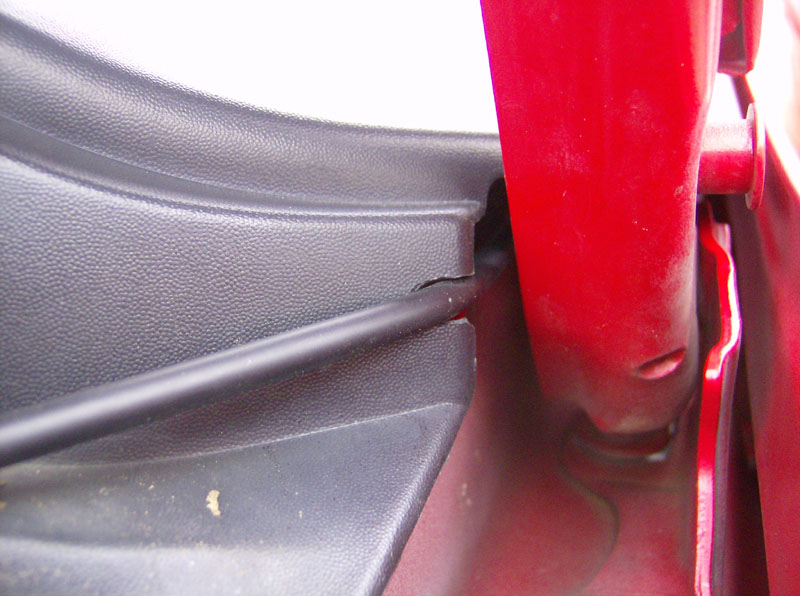
Then I routed the cable down by the front edge of the cowl. I used a cable mounting clamp with bolt & nut in the location that originally had a plastic clip. I used a different cable mount, but you could easily use the one supplied in the mounting kit.
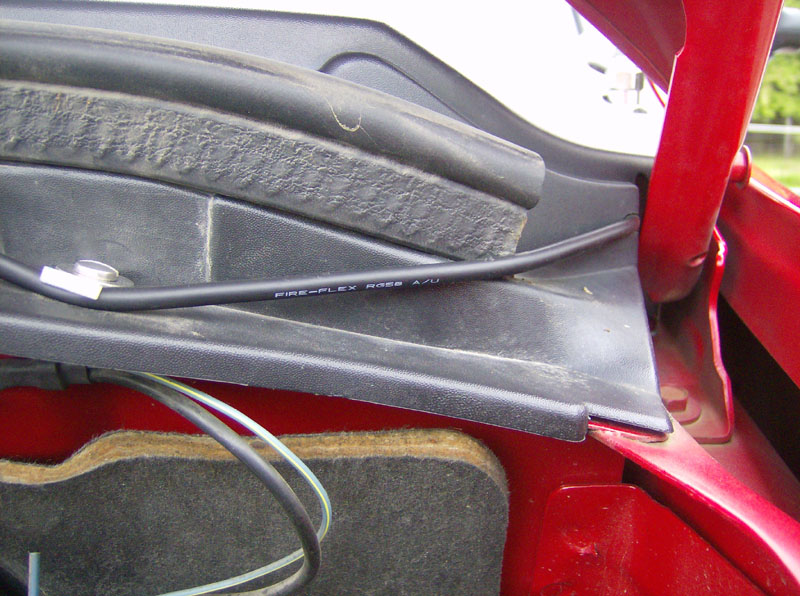
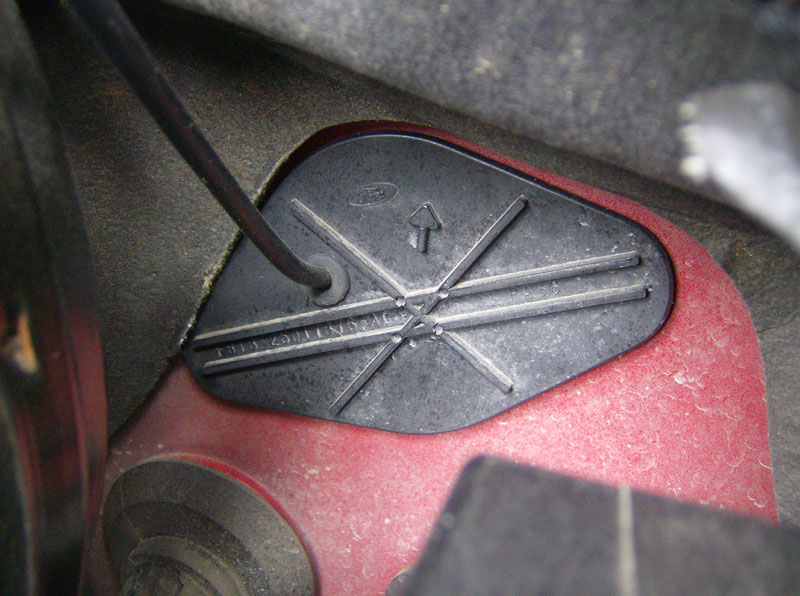
Then I had to choose how to penetrate the firewall to get the cable inside the cab. There's a plastic plug on the driver's side of the firewall that is perfect for this. I'm not sure what this plug is for (possibly something related to the clutch for a manual transmission?), but on my truck it was just a blank plug that easily popped out. I drilled a 3/8" hole in the plug and installed the grommet provided in the mounting kit. I pulled the coax through the grommet and then reinstalled the plug into the firewall.
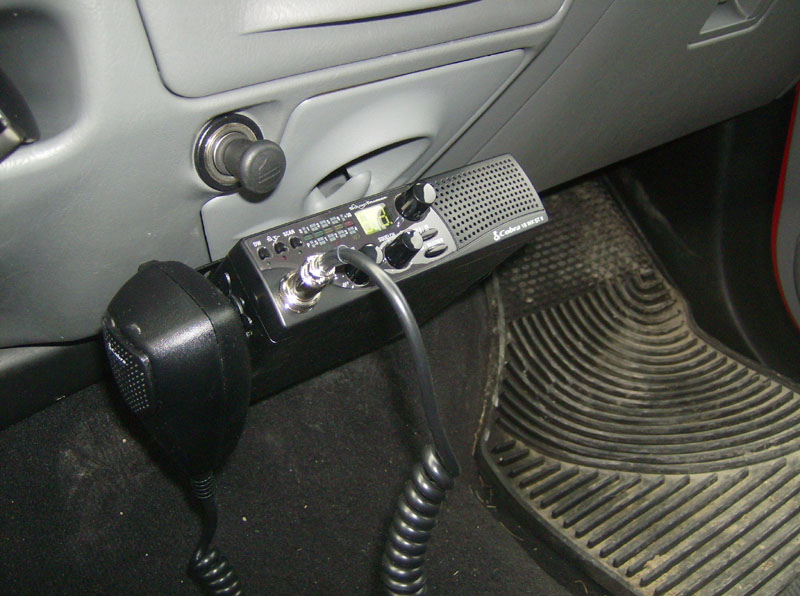
Now, as a little sidetrack, I bought a Cobra 18 WX ST II CB because of its reasonable price and that it had the weather channels built in. I mounted it using the existing screw holes for the trash bag hook on the lower part of the dash. I had to re-drill the CB mount to match the bolt hole spacing, and use longer screws to mount the bracket and CB.
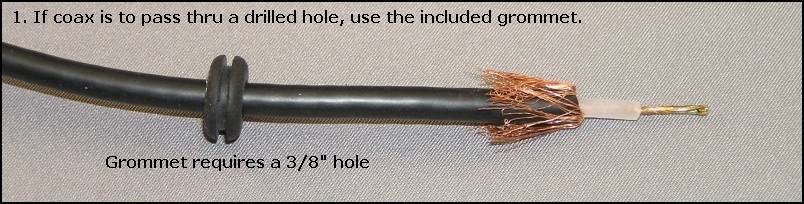
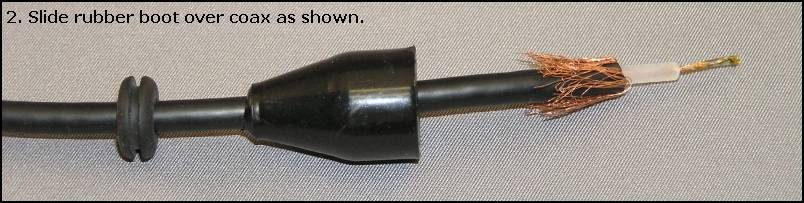
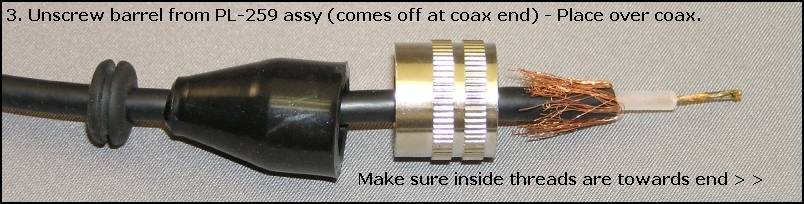
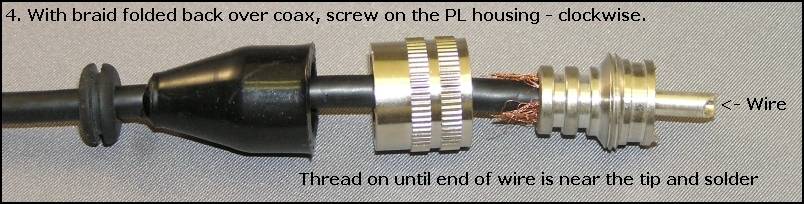
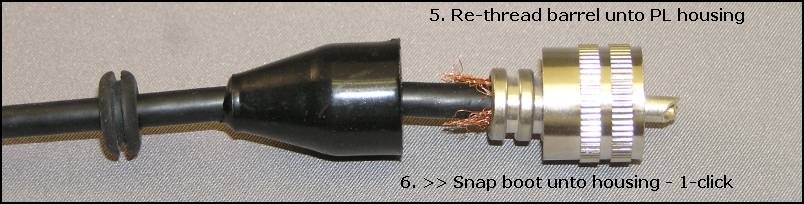
Next, I routed the cable behind the dash and dropped it down just behind where I mounted the CB. At this point its time to install the coax connector onto the end of the cable. See the images from the Firestik tech page that illustrate this process.
Images courtesy of the Firestik
Antenna Company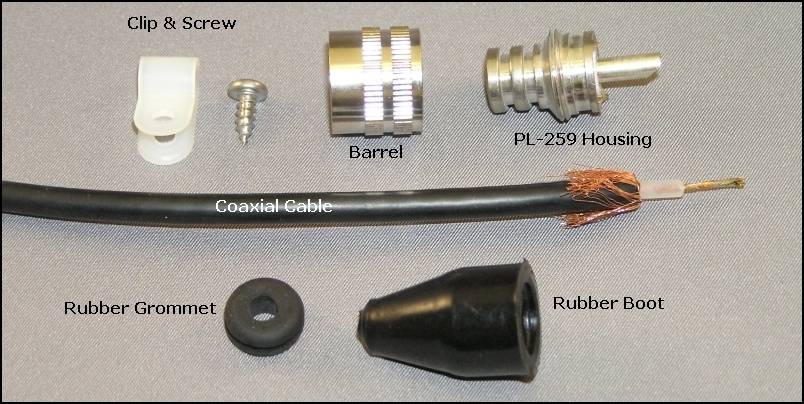
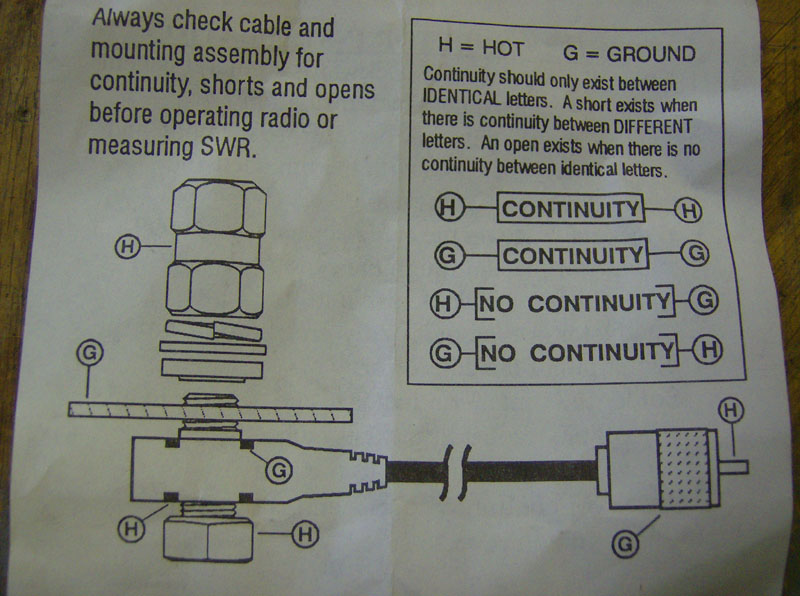
Next, I used a volt meter to check continuity. You should see very low resistance between the center pin of the coax connector and the body of the antenna mount. You should also see very low resistance between the shell of the coax connector and any ground on the truck, I used the framework behind the dash to get to a ground. You should also see very high resistance between the shell and the center pin of the coax connector. Below is a picture of the instructions that came with my antenna mount, that details the connectivity of the signal(H) and the ground(G).
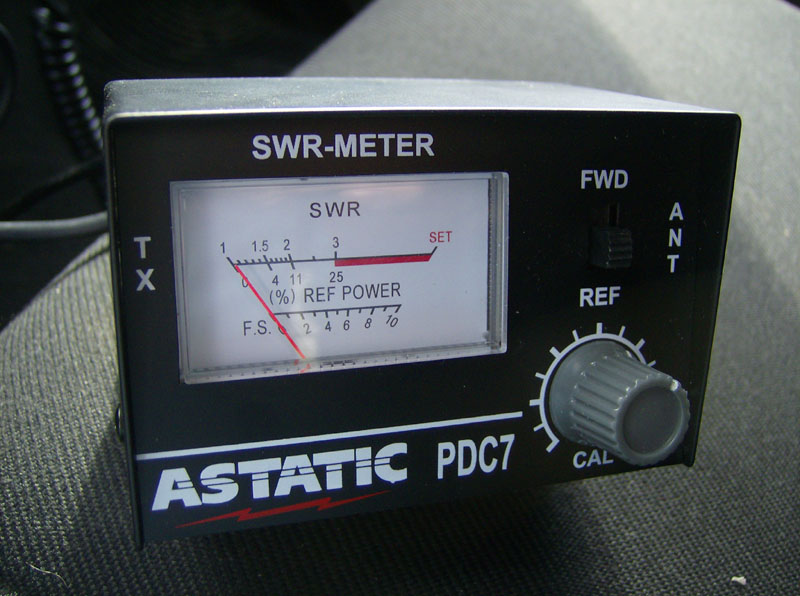
Finally, you're almost ready to connect the antenna cable to the CB! Do not forget to tune your antenna using an SWR meter. The Firestik II antenna is convenient because it features a tunable tip. I snagged an inexpensive SWR meter and jumper from ebay to use to tune my antenna. After reading through the pages, in the links below, I was able to get the SWR below 1.4 for channels 1, 19, and 40. For what it's worth, my SWR reading before tuning was right at 3.0.
See the links below for info about tuning the antenna.
Now you can connect the cable and you're done!
Again, thanks to KenReb for this idea!
Questions or Comments? Email jmray@frontiernet.net