 Next,
there is a bit of work to do inside the boat. The entire inside of the
boat needs to be saturated in unthickened epoxy, and the cockpit needs
a layer of glassfiber cloth to be applied to it. I think that this is great
practice for glassing the exterior of the boat; I can make mistakes now
that will not be seen. Hopefully, I can learn from the mistakes I
make now. In this picture, a special rail is installed to the inside of
the hull, glued with epoxy thickened with cab-o-sil. I made the rail from
leftover shear clamp material by planing the contour of the inside of the
hull with my block plane. The plan is to mount brass inserts into this
rail, and then install the footbraces to the rail. I decided to take this
approach for various reasons: I cannot bear the thought of piercing the
hull to mount the footbraces, the rail gives me some latitude on the fore
and aft placement of the footbraces, and if damage occurs in the future,
I can re-mount the footbraces without re-piercing the hull. And by the
way, I applied packaging tape below this joint before the gluing. All those
drips of epoxy and cab-o-sil peeled right off with the tape when the glue
was dry. Saran wrap and packing tape are your friends.
Next,
there is a bit of work to do inside the boat. The entire inside of the
boat needs to be saturated in unthickened epoxy, and the cockpit needs
a layer of glassfiber cloth to be applied to it. I think that this is great
practice for glassing the exterior of the boat; I can make mistakes now
that will not be seen. Hopefully, I can learn from the mistakes I
make now. In this picture, a special rail is installed to the inside of
the hull, glued with epoxy thickened with cab-o-sil. I made the rail from
leftover shear clamp material by planing the contour of the inside of the
hull with my block plane. The plan is to mount brass inserts into this
rail, and then install the footbraces to the rail. I decided to take this
approach for various reasons: I cannot bear the thought of piercing the
hull to mount the footbraces, the rail gives me some latitude on the fore
and aft placement of the footbraces, and if damage occurs in the future,
I can re-mount the footbraces without re-piercing the hull. And by the
way, I applied packaging tape below this joint before the gluing. All those
drips of epoxy and cab-o-sil peeled right off with the tape when the glue
was dry. Saran wrap and packing tape are your friends.
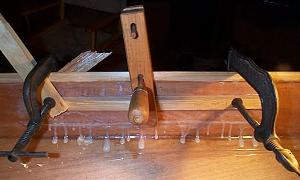
I mixed up a batch of epoxy thickened with wood flour, and filled the wire holes and the spaces between the panels. After it cured, I spent numerous hours with the random-orbital sander fairing it. Here it is worth mentioning that there is a tool that out-performs sanding in terms of accuracy, speed, finish, and cost. It is the cabinet scraper. It consists of a rectangle of high quality steel approximately 6 x 2.5 x .050 inches. I bought a high-quality one made by Sandvik for $6.00. When sharpened properly, it cuts with a planing action and is easy to control. I never scraped through a ply, something that is common with machine sanding.
Lastly, I washed the boat in preparation for glassing the hull.