
Gerry Maroske published an article on tube fittings at http://www.studiofurniture.com/diary/kayak/outfit/moroske/
These fittings are easy to make, and strong. The trouble with this method is the extraction of the mold tube. If the mold-tube is too long, it will break before it can be extracted. So, most builders make their tube fittings about an inch or so in length. I was going for a different look. I wanted the decklines to go straight across the deck, and give the illusion that the deckline was attached through the "skin" of the kayak,. to the frame. But I also wanted the water-tight feature of the tube fitting. So, here is a variation of the "Maroske Tube Fitting".
Preparation:
First of all, whenever the hull is pierced, the builder should employ
the "drill-fill-drill" method. I wanted fittings 3/8 in diameter, so I
drilled out to 1/2 inch, filled the hole with thickened epoxy, then later
drilled on center the 3/8 inch hole. This left an epoxy bushing, molded
into the hull, to serve as the entrances of the tube fittings.
|
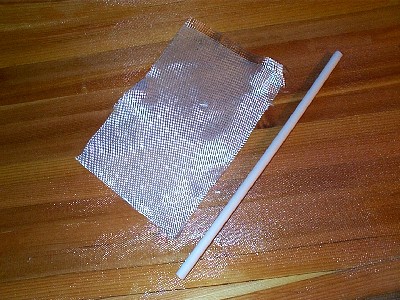
I started by fabricating some fiberglass tubing. I figured that epoxy has only two ways to stick: with a chemical bond, or with a mechanical bond. So I molded the tubing on 3/8 diameter teflon rod. Teflon is well known for not bonding with many substances, and since this rod was very smooth, there was very little for the epoxy to mechanically grab. This is 6oz plain weave cloth, cut wide enough to wrap around 3 to 4 times. The cloth was wet out and squeegied on a table covered in plastic, then the wet cloth was wrapped around the tube. The tubes cured hard within 24 hours. |
|
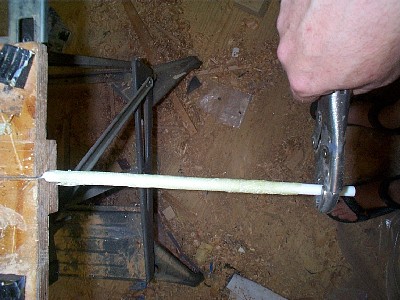
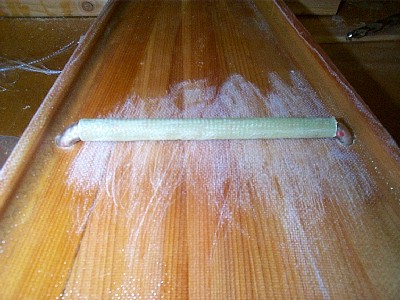
The tubes were sanded to avoid injury. The rod was held in a vise, and a little torque was applied. This was all it took to free the tube from the rod, and the tubes slid off. |
|
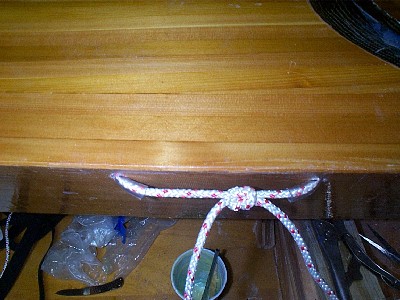
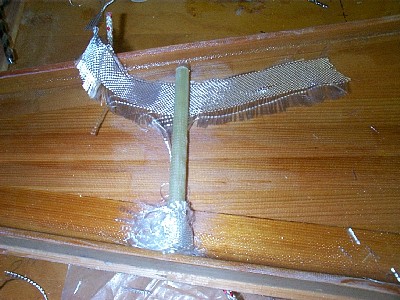
Now, the assembly proceeds similarly to the standard tube fitting. The new glass tubes are trimmed and cut to length. Short segments of vinyl tube are slid into the ends. A length of rope threads through the assembly, to keep the vinyl from collapsing. |
|
The view from the exterior of the kayak. The vinyl tubing protrudes from the hull, and the rope is tied, holding everything in place. |
|
Now, glass scraps are wrapped around the vinyl corners, to form the entries of the fitting. |
|
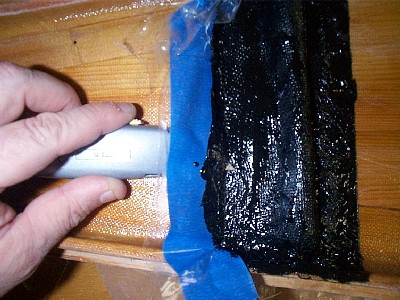
More glass scraps are added, the fitting is wet out, and a patch of glass cloth covers the whole thing. I have chosen to tint the epoxy black for the wet-out. In this photo, the fitting has cured, and I am trimming under a piece of packing tape to get a straight edge. |
|
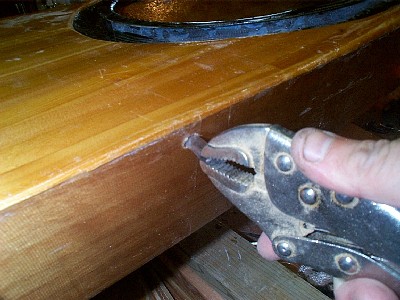
After the fitting has cured, the rope and the vinyl mold-tubes are pulled out. Epoxy is carefully brushed into the entrances to make sure all has sealed. |
|
A finished fitting. The deckline enters the hull, and emerges 5.5 inches away. All is watertight and strong. |