Odyssey
RPM Select Fire Modification
Please keep in mind that any changes made to your marker may not
be acceptable at some fields and in most tournaments.
The select fire modification to the
New Model/Style RPM allows for mode changes to be made between Semi-Auto,
Ramping and Full Auto without the removal of the grip or the need for jumper
installation, jumper relocation or jumper replacement.
This modification requires
measuring, drilling and soldering, if you cannot do one or any of these things
for yourself then please do not try this procedure. I will not be responsible
for any mistakes made by you or anyone who attempts this modification to their
own or a friend’s marker. You are
responsible for your marker and your actions too and with the marker.
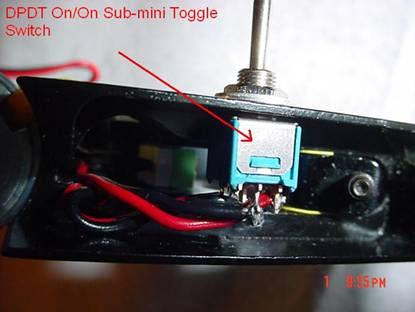
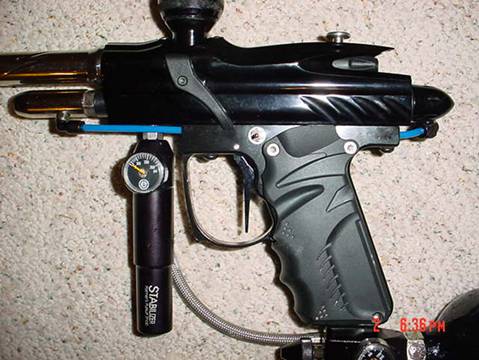
Parts required include; sub-mini
on/on toggle switch, rechargeable phone battery connectors of the proper size (phone
battery & other connectors may require modification).
The
Process
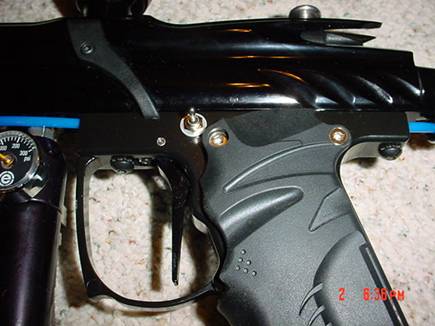
Carefully measure the area to be
drilled for the switch installation. I
highly suggest that you measure your switch and trigger frame and calculate for
yourself the center for the hole to be drilled.
It is said that the RPM specifications vary from marker to marker and it
would be safe to say there may be some variances in the switch as well. They clearances are pretty tight to get the
switch installed, so be certain your drilling in the right spot.
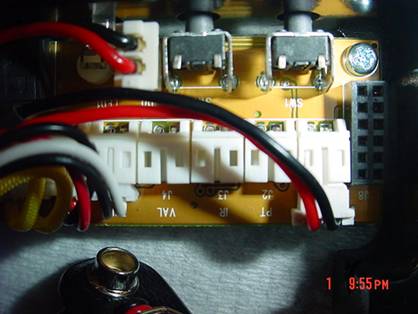
Route your wiring through the marker
to make sure your connectors have enough wire length to complete the job.
Depending on the connector you get you may have to file or sand the edge off of
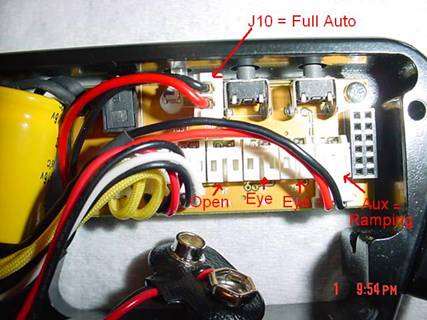
the AUX port connector to allow for a proper fit. The J10 connect has more room and shouldn’t
require any modification. I got my
connectors from some old cordless phone batteries. There may be a better source for them, but
Radio Shack didn’t carry any and I knew we had these at home and with minor
plastic removal on the sides of the AUX connector they fit and worked well
enough.
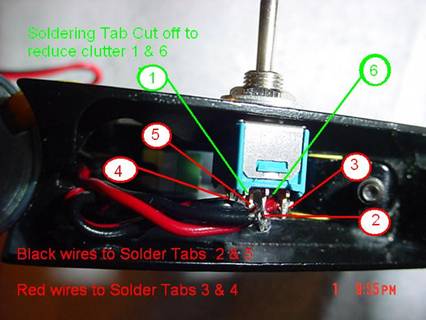
Just a quick map of where the leads
need to go and the switch solder to wiring lead solder locations. Note that I cut off the tabs labeled 1 &
6 simply to reduce clutter. Also, it can
be seen that the two black wires (which actually have continuity when tested
with a DVOM) were solder to the middle and the red wires were soldered adjacent
to their respective black wire connector.
Its pretty simple once you stop and think about
it, your simply using the switch to make and/or break contact rather than the
supplied jumper.

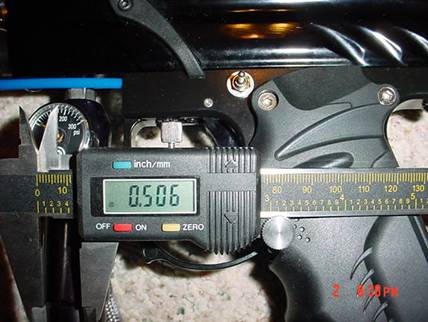
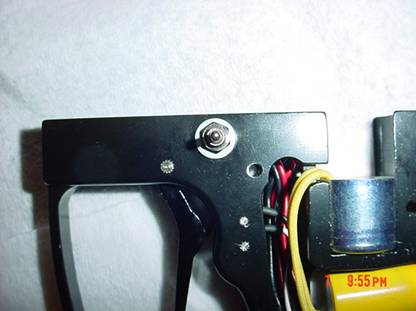
A picture of the measurement of the overall
height of the switch when mounted in the markers trigger frame, it sticks out
just over ½ inch.
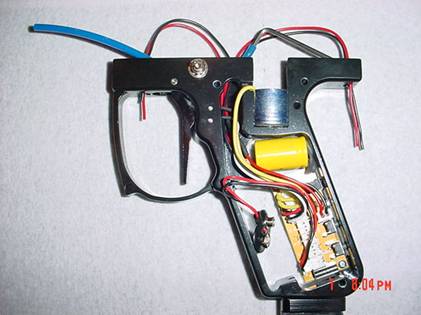
The
Finished Product
I’m overall happy with this
Modification / Upgrade. With the eyes on I ran a full hopper through the marker
in no time with out single chop.
Select
Fire Modes of Operation
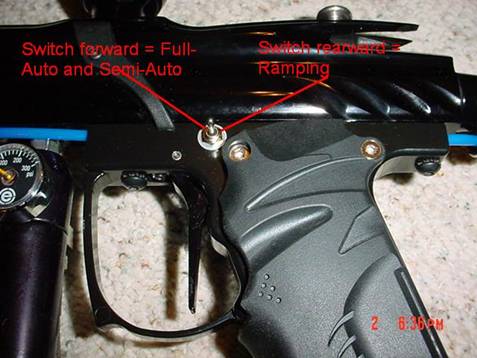
With the Switch in the forward
position (toward the barrel) the marker is in Full-Auto or Semi-Auto and can be
switched between the two modes by pressing and releasing the safety
button. With the Switch in the rearward
position (toward the Ram) the marker is in Ramping mode (limited to 15bps by
the board).
You need to determine how you want
to configure your wiring. For me it was
simple put Full-Auto forward on the switch, so it could easily be switched to
Full-Auto by pushing forward with my right thumb and back to Semi-Auto by
pressing on Safety Switch. Ramping is with
the switch in the rearward position for local tournament play. You can reverse this and make Ramping forward
and Full & Semi-Auto rearward, the choice is yours, and all you have to do
is plug the terminals in the opposite way.
The switch itself and the ability to change
modes may not be allowed at some fields or sanctioned tournament events. Check
with your local field before you perform any part of the modification (at least
see if it will be allowed if the switch is disabled by unplugging the
connector).
Parts
availability
All parts are readily available, for
example the white terminal connectors can be taken from some used cordless
phone batteries (please note the polarity of the black and red wires as they
may need to be switched in some applications).
I have found new phone battery connectors on the web, but the parts were
not available at this time, if this changes I will post the web-site
later. The switch can be bought off eBay
or possibly found at Radio Shack, it is a Sub-mini On/On Toggle Switch.