So
you have an RPM and you want to an Autococker Low Pressure Regulator?
Well
you’ve come to the right place.
If you have some skills this modification isn’t
bad, but a 3mm brass fitting is likely to break off and required drilling and tapping
(see pictures). If you are not comfortable disassembling your marker,
you don’t know how to or do not have the tools to drill and tap then please do
not try this modification. I will not be responsible for your marker or lack of
skills if you attempt to change, repair or otherwise modify your marker. Chances are you will void your warranty if
you try to perform this modification. So
before you start, know what you are doing, know whether you want to do this to
your marker and please read through this page to see if you can handle it.
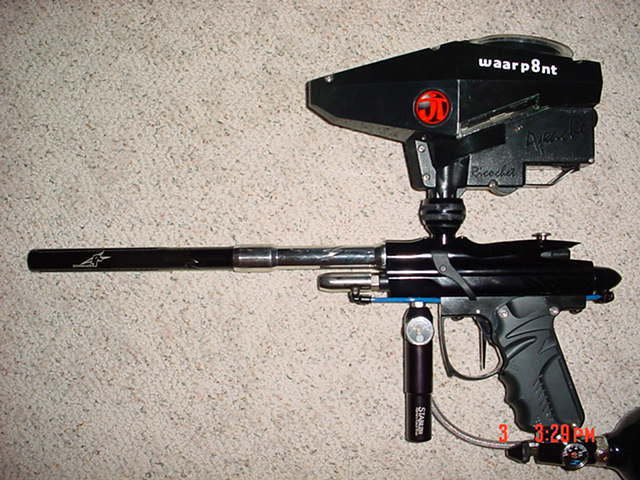
Below are pictures of my own
personal marker with modifications including parts I have machined to install a
common Autococker Low Pressure Regulator (LPR) on an Odyssey RPM. If you have questions, please read
the discussion at the bottom of the page.
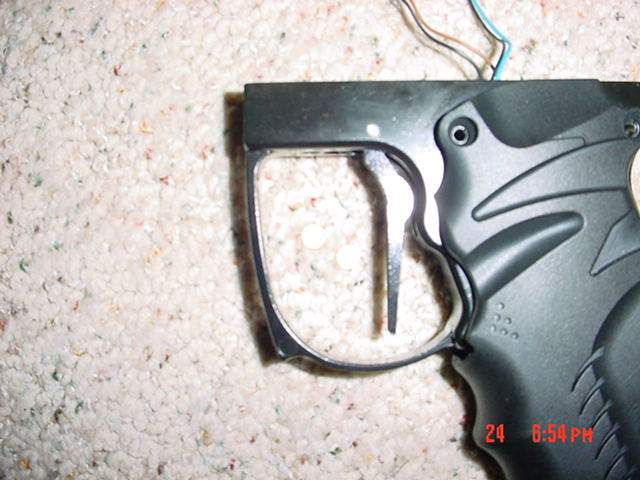
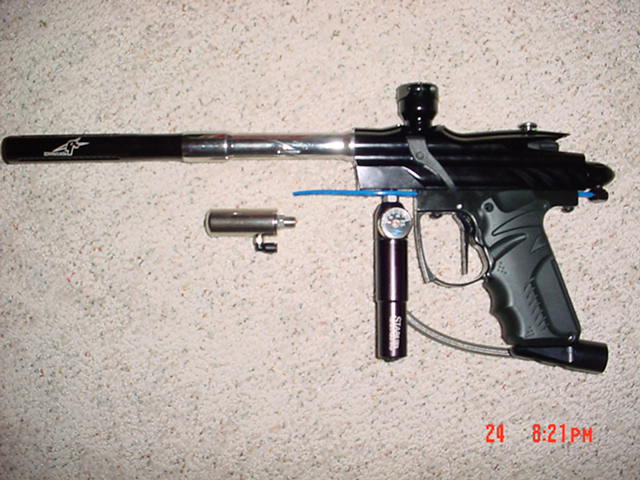
Before the Autococker LPR
modification.

Installing an Autococker Low
Pressure Regulator;
1st step for the LPR is
to remove the trigger frame assembly, to gain access to remove the Air Fitting
and change hoses on the LP Valve Body (see trigger shims for a more complete
remove guide).
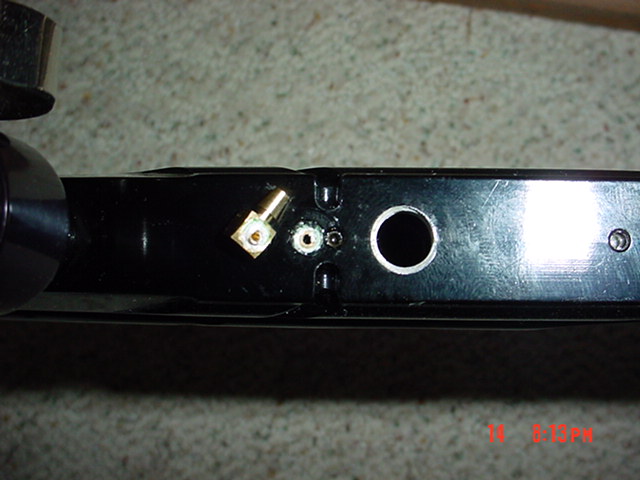
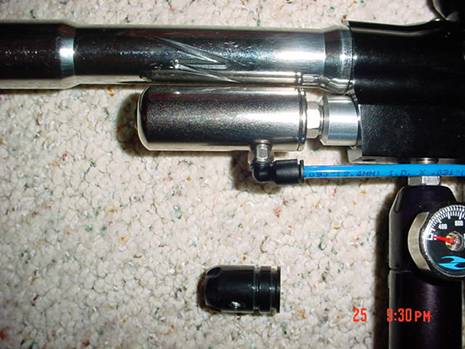
The 3mm brass fitting that
usually breaks off. If this happens,
you’re going to have to drill and tap it back to 3mm (Please use the proper
drill and tape sizes, as the set screw is very close and could easily ruined if
something is done wrong). Before you
drill and tap you’ll need to disassemble the marker, so metal fillings do not
get inside the marker and ruin stuff.
This is where you need to decide if
you can handle doing the mod.
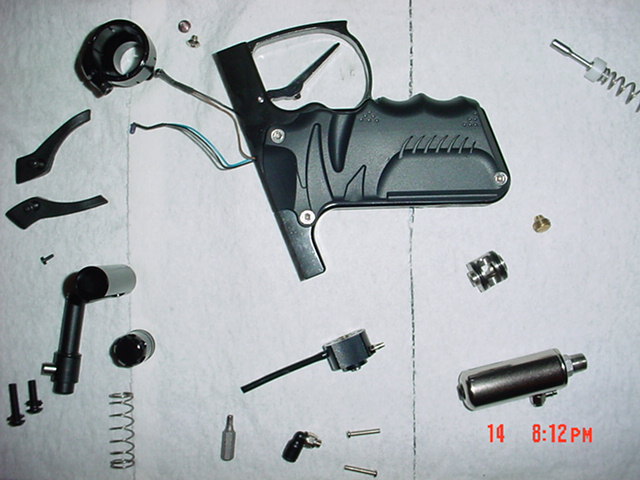
Some of the pieces you’ll
want to remove for disassembly. Check your owners’ manual for individual part
names.
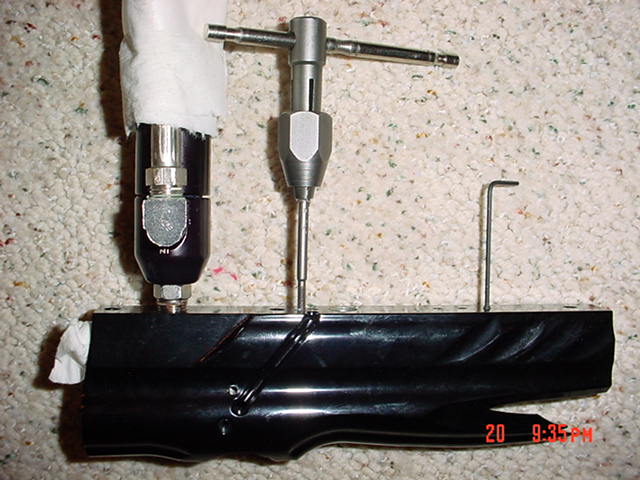
Picture of the Tapping process, notice I
didn’t remove my Palmer Stabilizer, but did use a paper towel to prevent metal chips
from causing any damage to the internal components of the marker or the
regulator (cosmetically and mechanically).
Once
drilled and tapped you will have to install a 3mm screw and shim it some how to
about the height of the brass 90* fitting.
The upper trigger screw hit on the brass fitting and now it will hit on
your screw, so you will have some trigger adjustment.
I would prefer to use a hex screw with a nut installed on it as a shim,
but Phillips is all I could find locally.
Apply a small amount of Blue loc-tite to the threads to help prevent
leaking around the screw.
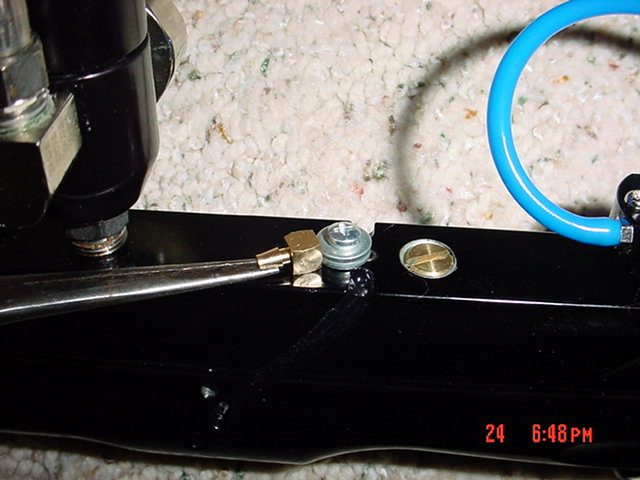
A picture of the work that
was done under the trigger frame.
A Palmer Micro Rock to be
installed.
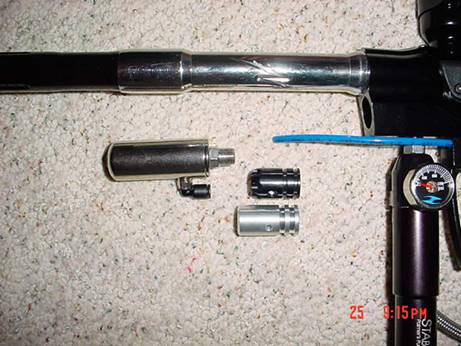
The factory volumizer, two
different Low Pressure Regulators, LPR adapter fittings (one made from the
original factory volumizer, one made from aluminum and one made from Delrin).
If you are going to attempt this
modification yourself you will want to use a lathe and will need a good drill
and tap set. The needed tap sizes are
1/8 NPT and 10/24, please consult a drill and tap chart for the proper drill
bit sizes.
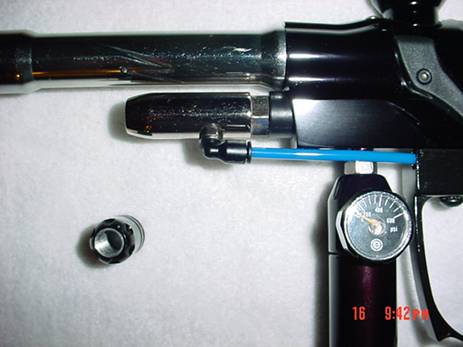
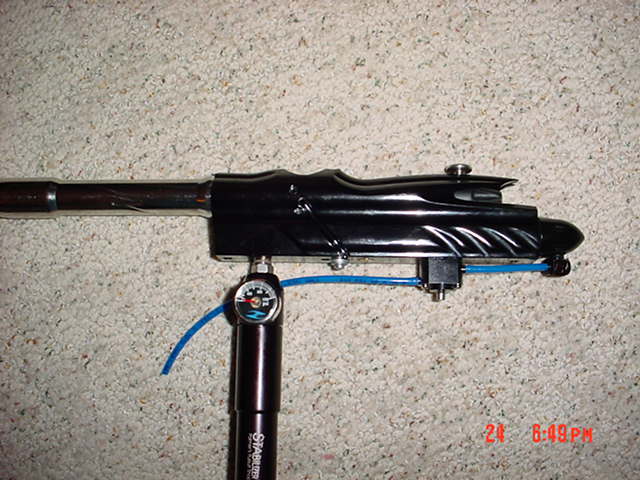
LPR installed on the LPR
adapter and inserted into the marker, with the addition of the QEV we now have the
removed 90* fitting from the ram installed on the LPR (see the page on adding a
QEV to your marker).
Apply some Blue Medium Strength
Loc-tite or Teflon Tape to the threads of the volumizer retaining screw to help
prevent leaks.
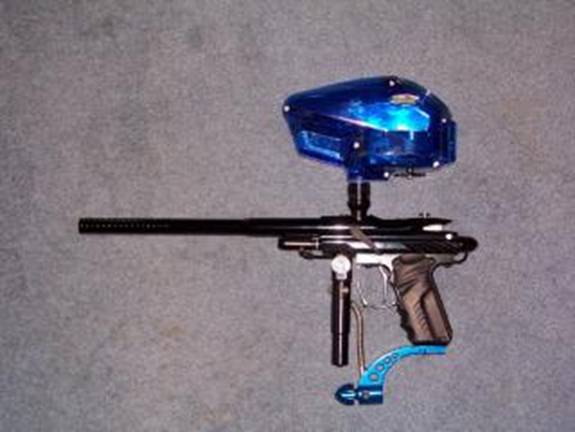
Please note in the picture below
that the Palmer Micro Rock is too large to allow for barrel removal with the
LPR installed. While the Micro Rock
functioned fine, I would recommend going with a smaller regulator like the
Outcast Sledgehammer Low Pressure Regulator.
The finished product in
Chrome!
Delrin LPR Adapter
The finished product in
black!
Factory volumizer modified to fit a
LPR
Discussion of the Process
Please note that some barrels may
not thread on or thread off due to the tightness of the stacked tube design of
the RPM Marker and the lack of clearance between the barrel and the LPR. If you try this modification you may want to
watch out for this problem and this will be depending on the manufacture of the
barrel and LPR you choose.
Which leads us to the big
question….what Low Pressure Regulators will fit, function and allow for barrel
clearance?
Before you read the list it is possible many
manufactures LPR will work if you use a combination of 1/8 NPT 45* or 90*
elbows.
The list of LPR’s tested as of June
24, 07
·
The
will fit LPR’s include; WGP Outcast Sledgehammer LPR.
·
The
LPR’s not tried but may fit include; MecDev, Smart Parts.
·
The
will not fit LPR’s with-out some combination of elbows include; ANS, WGP
Sledgehammer, Palmer Rock, Palmer Micro Rock, WGP Trickler.
Updates to the page will be made as
new ideas and other manufactures products are tested.
This page is maintained by waarp8nt
and you can catch me on my favorite forum
www.PbNation.com