Sail Panel Replacement
 Sail Panels
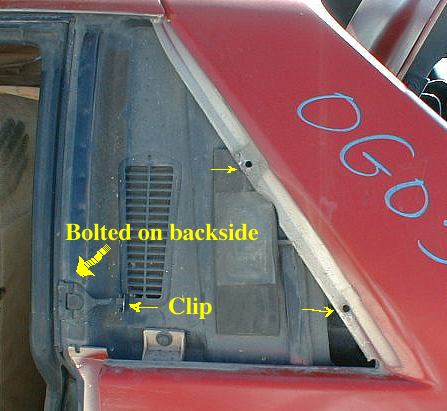
Have you ever wondered how that sail panel is held to the body? The picture here to the right shows an 85 SE with the panel removed. I recommend you remove it if you are going to paint your car or if you need to repaint the panel.
Please note that if you only want to replace the plastic sail panel, it can be done without removing it from the car. Remove the plastic panel by working a putty knife at each corner carefully. It will start to lift and crack, and break off. Just work carefully. Once the quarter panel is removed, use 3M General Purpose Adhesive Cleaner (PN 051135-08984) to remove the old double-sided tape. Clean the panel well and then replace the tape (3M PN 05131-06384) and install the new plastic sail panel.
 Removing the Sail Panel
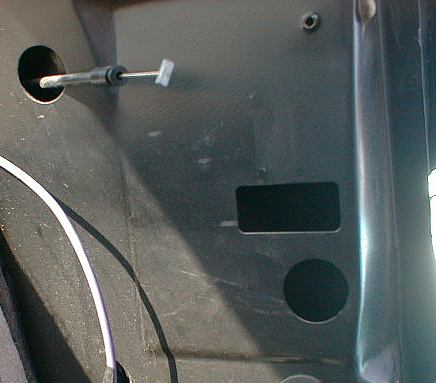
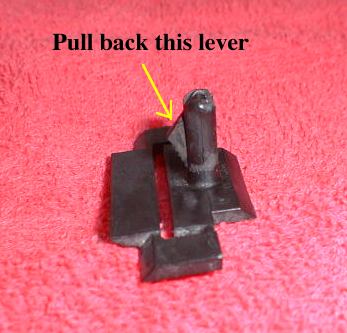
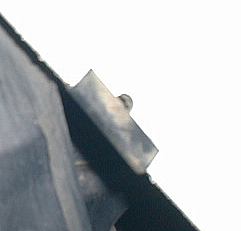
Remove the seats from the car. Remove the seat belt bolts and the upper rear trim piece. Look through the lower hole and remove the nut. Lift the front of the sail panel about one half inch. Push the sail panel gently toward the rear of the car. The clips will stay attached to the car and release from the panel. I have found 2 types of clips, one having what looks like a straight pin that inserts into a metal clip (early years), the other having what looks like a small lever that protrudes directly in to the body (later years). If the type has a threaded stud wears out and will not stay in the metal clip, I have taken the lever type and modified them slightly to make them fit in the early sail panel. Note you will have to drill the lower hole out slighty to allow the lever type to fit
 Installing the Sail Panel
Install all the clips on the Sail Panel and align the Sail Panel with the rear holes and the front hole and push it in place. Reinstall the nut on the front stud
 .....
.....
 ......