| Russell-3L |
| Hard-core CEG'er |
|
|
| Reged: 08/23/02 |
| Posts: 3732 |
| Loc: Pittsburgh, PA | |
|
i think jb
weld could do it, we use it in our 3L hybrids 
personally
id take it to a welder in your area, its a better solution
--------------------
Russell
Oval Port 3L Nearly Done
MTX75 w/ Homebrew Zetec FD and Torsen Complete
Post Extras:  

|
| Kasey Chang |
| CEG'er |
|
|
| Reged: 01/31/03 |
| Posts: 233 |
| Loc: San Francisco, CA | |
|
Hmmm... So
cracked tranny case CAN be welded or even JBWelded? That increases
my options somewhat... (I have a cracked tranny case too).
--------------------
Just a plain jane '96 LX V-6
here...
Post Extras:
|
| btrautman |
| CEG'er |
|
|
| Reged: 11/13/01 |
| Posts: 1176 |
| Loc: Austin, TX. | |
|
I don't know
about welded. But I did some research and the JB Weld product seems
too good to be true. It states in has been used in cylinder heads!
Impervious to oil, gasoline, water, etc. and can withstand
vibration, pressure, etc. I am going this route and see how it
works. This product has been around for quite some time from what I
understand......
--------------------
An ounce of
prevention provides a pound of cure!
Post
Extras:
|
| btrautman |
| CEG'er |
|
|
| Reged: 11/13/01 |
| Posts: 1176 |
| Loc: Austin, TX. | |
|
First item
checked is Drive Carrier and differential assembly. No chips, nicks,
etc. All is fine.
Next item checked is the low one-way clutch
assembly, It was taken apart and cleaned, inspected and all is well.
Check was made of proper rotation within race to be sure it was
reassembled correctly, etc.
Forward One Way Clutch assembly
was taken aprt and inspected. No nicks, chipped teeth, etc.
Reassembled and checked for proper rotation within
race.
Driven needle bearing in case was replaced with
threaded rod and puller. No problems here.
Lube tube was
removed from seal in case. Seal in case was removed and replaced.
Lube tube was reassembled. Apparently this lube tube is a pressure
fit into this seal. The valve body provides oil to this valley which
the lube tube then drips onto the driven needle bearing in case -
where axle goes through. It is critical to replace this seal to
ensure that good fit is made between seal and tube.
One tool
that I will have to purchase is a seal protector kit. The piston
seal on the clutch piston, etc. has to be compressed for it to fit
into the piston assembly - other wise it is quite easy to pinch or
damage the seal. I am getting a quote from Transtar Industries that
has this kit in their catalog.....I hope it is not too
much!!!!!
The other tool that is perhaps needed is the clutch
spring compressor. This item is over a hundred dollars and more from
what I have seen. However, I went out and bought 2 6" C clamps $9.99
each. I then placed 2 flat bars on the other side of the direct
housing. The base of the c-clamps resed on this bar and I just
clamped down on the spring retainers until I had enough room to
remove the retaining clip. Total cost $20 vs $100 and
more.
On disassembling the Forward/Coast Direct Clutch
Cylinder assembly, I find I need to replace the retainer and springs
- there are two of them. These are not that expensive. I also have
to replace the Forward Clutch piston assembly. This part is about
$60. I had some grooves warn into the inner surface where the coast
clutch piston fits.... The rest of this assembly has been checked
and is fine.
Now out to buy some JB Weld for the cracked
case.....
--------------------
An ounce of
prevention provides a pound of cure!
Post
Extras:
|
| Contouraholic |
| Hard-core CEG'er |
|
|
| Reged: 08/15/02 |
| Posts: 1228 |
| Loc: West Milford, NJ | |
|
Originally posted by
btrautman:
Now out to buy some JB Weld for the cracked
case.....
FWIW, It does work well.
However, it only works as well as the prep.
Make sure you
thoroughly clean the area with a good solvent. Use a dremel and open
the crack a ittle to get good penetration. Also, I would consider
drilling a hole at the ends of the crack to stop the crack from
propagating. Use a small screw to fill the hole after applying the
JB welb. Use a flood lamp to heat the area after applying and give
it more than the 24 hours needed to dry. The heat will speed up the
drying but still give it plenty of time to cure. It will propably be
stronger than the case around it.
Have fun.. 
--------------------
My name is Richard. I was a
Contouraholic.
NOW: '02 Mazda B3000 Dual Sport, Black
BEFORE: '99 Contour SE Sport
Duratec ATX Spruce Green
PIAA 510's, Foglight MOD, K&N Drop-in
Post Extras:
|
| btrautman |
| CEG'er |
|
|
| Reged: 11/13/01 |
| Posts: 1176 |
| Loc: Austin, TX. | |
|
Could you
recommend a good solvent? Thanks for the tips I'll certainly follow
them....
Bob
--------------------
An ounce of
prevention provides a pound of cure!
Post
Extras:
|
RoadRunner
|
| Hard-core CEG'er |
|
|
| Reged: 03/11/01 |
| Posts: 1603 |
| Loc: Westchester Co., NY, USA
| |
|
Originally posted by
btrautman:
Could you recommend a good solvent? Thanks for the tips I'll
certainly follow them....
Bob
99.9% Isopropyl Alcohol is
your best bet.
It will remove any oil and will air dry.
It
will not hurt any rubber or plastic or metal.
DO NOT use 70%
Rubbing Alcohol.
It is NOT the same.
Good luck with the JB
Weld.
I would have the case scanned for any further crackage that
you do not
readily see before attemping and after attempting
repair.
Looks like your oil pump did spike, and crack your
case...
--------------------
Pete...
2004 Mercury
Marauder 300A
Black Clearcoat/Dark Charcoal LEATHER
DOB
10/31/2003
DOP 1/2/2004
http://www.mercurymarauder.net/
Post Extras:
|
| btrautman |
| CEG'er |
|
|
| Reged: 11/13/01 |
| Posts: 1176 |
| Loc: Austin, TX. | |
|
OK, I was told
that for a lip seal protector kit for the CD4E the price of this kit
from toolsource would be $110.00!!!!! This seal kit is made by ATEC
tools in san antonio. Well I really have a hard time paying for
something that I will only use once and that is made out of plastic
that is $110. Someone is taking advantage of somebody and it is not
me!!! So, I talked to a few people, one ole boy said that when he
rebuilt transmissions for a living he used "piano wire" to seat the
seals. This got me to thinking, I went out and purchased a sheet of
medium gauge plastic. I cut this into a strip of 4 inches high by
whatever circumference I needed for the piston. I then wrapped it
around the piston and pushed the piston into the assembly.....and
you know what happened it worked like a champ!!!! After it was
seated, I just pulled the plastic out from the sides with no
problem. I thought I'd pass this tip on to those that might want to
rebuild their CD4e and come across this
problem!!!!!
--------------------
An ounce of
prevention provides a pound of cure!
Post
Extras:
|
| btrautman |
| CEG'er |
|
|
| Reged: 11/13/01 |
| Posts: 1176 |
| Loc: Austin, TX. | |
|
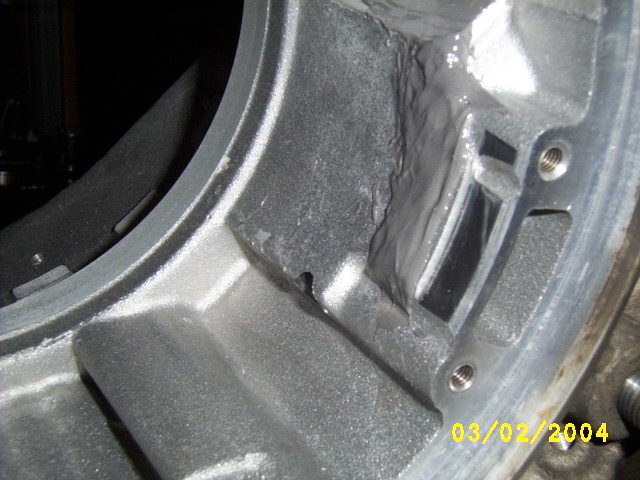
The next
picture is of the case housing that was repaired with JB Weld. First
crack was ground down a bit and surrounding surface roughed up,
surface was then cleaned with laquer thinner, last JB Weld was mixed
and applied
Next
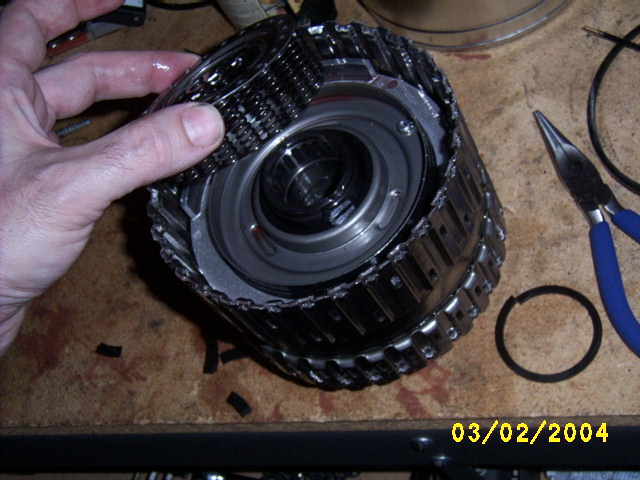
Direct/Coast- Coast side Clutch drum is reassembled
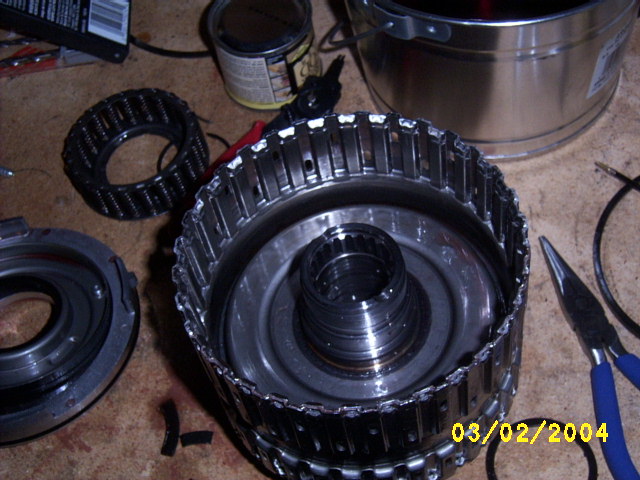
Coast
Clutch Plunger Assembly
Coast
Clutch Piston
Retainer
Spring - Coast Clutch
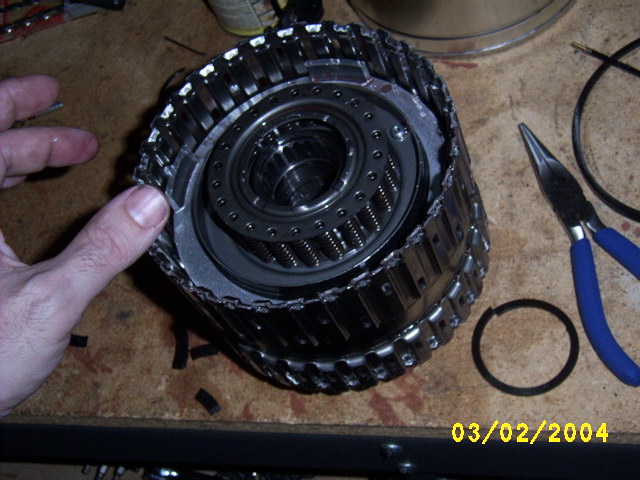
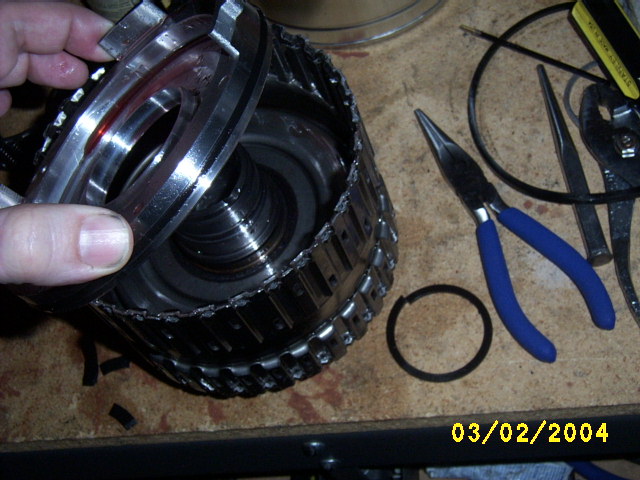
Forward
One-Way Clutch and Low-Intermediate Sun Gear Assembly
This
was taken apart cleaned, inspected and reassembled. It is import to
pay attention to how sprag is reassembled, there is an thin and
thick end cap that mounts on the sprag in a specific way according
to drag clip orientation.
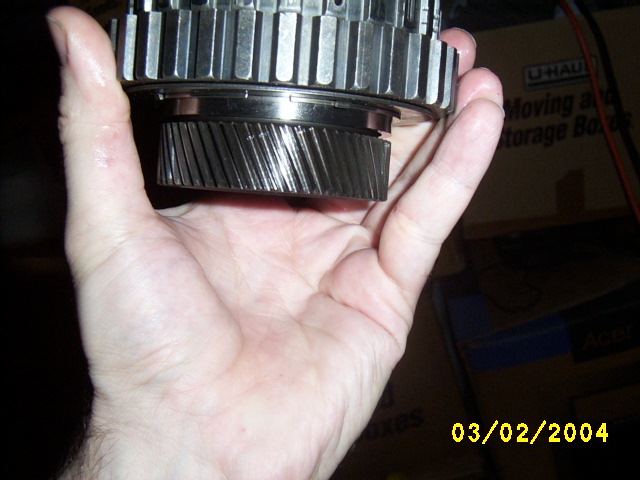
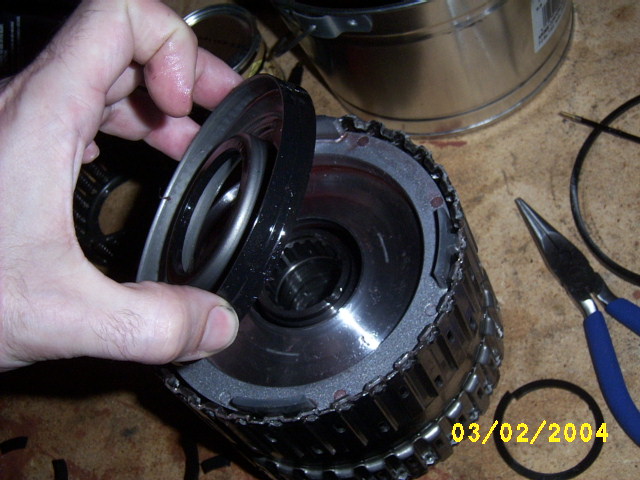
Low
One-Way Clutch Assembly, cleaned and inspected and then reassembled
and check for proper rotation that indicates if you reassembled it
correctly and or working correctly.
Final
Drive Carrier and Differential Assembly,
Cleaned, checked
for nicks, etc. and then reassembled.

This
weekend I'll include pictures on the final direct/coast drum
assembly completion.
Making progress!!!
--------------------
An ounce of prevention
provides a pound of cure!
Edited by
unisys12 (12/10/04 07:31 PM)
Post Extras:
|
| btrautman |
| CEG'er |
|
|
| Reged: 11/13/01 |
| Posts: 1176 |
| Loc: Austin, TX. | |
|
Well, I
assembled the coast/drive clutch/drum and performed a pressure test.
It turns out I had a leaking seal. removed the pistons and found one
seal was torn. Looks like my homemade plastic wrap did not quite
work. I have broke down and purchased a the seal piston kit locally.
I have also picked up a replacement piston from Ford, it was only
around 7 dollars or so. I will retake pictures using the seal piston
protectors..... Guess I'll have this up for sale when I'm through
with it! The pressure test method with an air compressor is a nice
way to check proper sealing BEFORE it is installed back in the car!
I plan
on having everything back together this weekend.
--------------------
An ounce of prevention provides a
pound of cure!
Post Extras:
|

 Flat
Flat  Threaded

