Preparation
I prepared a workspace in the attic above my garage. I built a
table from three discarded lauan doors placed lengthwise atop legs made
from 2x4s. The result is a flat, long work surface 28 inches wide by over
twenty feet long.
Next, I collected tools, and invested in a good respirator. (Epoxy gives
off fumes while it is curing.)
The kit arrived in three boxes, the largest of which housed the long
plywood parts.
Lofting
 The plywood
came pre-lofted. However, plywood manufacturers generally produce in 4
by 8 foot sheets. This means that the various plywood components, which
were shipped less than eight feet long, had to be joined to full length
(17-18 feet) panels. Right and left halves of the bottom, sides,
and shear clamps were assembled by epoxying the scarfed joints together.
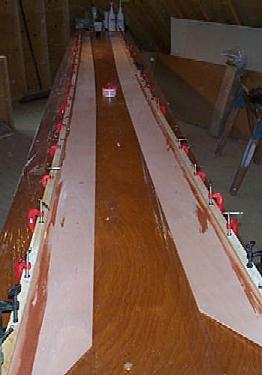
In this picture, the shear clamps (3/4" by 1" strips) have been epoxied
to the side panels, an operation requiring the use of almost every clamp
that I own.
The plywood
came pre-lofted. However, plywood manufacturers generally produce in 4
by 8 foot sheets. This means that the various plywood components, which
were shipped less than eight feet long, had to be joined to full length
(17-18 feet) panels. Right and left halves of the bottom, sides,
and shear clamps were assembled by epoxying the scarfed joints together.
In this picture, the shear clamps (3/4" by 1" strips) have been epoxied
to the side panels, an operation requiring the use of almost every clamp
that I own.
Stitching
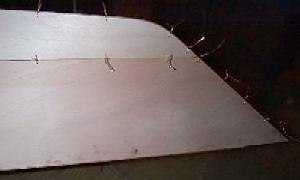 Next,
.062 inch holes are drilled all around the bottom panels, and through
the bow and stern areas of the side panels. Copper wires are then inserted
and twisted along the keel line and the bow and stern. A spreader stick
was inserted between the side panels to give it a "boat" shape, and these
were placed upside down on sawhorses. Next, the bottom panels were laid
atop the side panels, separated by scrap lattice wood. At this point, the
holes along the chine edge of the side panel were drilled to match the
holes in the bottom. I worked starting at the bow: aligning, drilling,
and wiring four or five holes port and starboard, continuing toward the
stern. When this operation is complete, the boat resembles a thin,
leaky canoe with whiskers. The hull shape is well defined, and I am amazed
at how stiff and light the structure is at this point.
Next,
.062 inch holes are drilled all around the bottom panels, and through
the bow and stern areas of the side panels. Copper wires are then inserted
and twisted along the keel line and the bow and stern. A spreader stick
was inserted between the side panels to give it a "boat" shape, and these
were placed upside down on sawhorses. Next, the bottom panels were laid
atop the side panels, separated by scrap lattice wood. At this point, the
holes along the chine edge of the side panel were drilled to match the
holes in the bottom. I worked starting at the bow: aligning, drilling,
and wiring four or five holes port and starboard, continuing toward the
stern. When this operation is complete, the boat resembles a thin,
leaky canoe with whiskers. The hull shape is well defined, and I am amazed
at how stiff and light the structure is at this point.