Scale Model
Once I had the boat drawn, I decided to test the offset table by building
a scale model. I decided on a scale of 1 to 10, for two reasons. First,
the kayak is 216 inches (18 feet) long, making for a 22 inch long model.
This is terribly convenient, because my material in 24 inches wide. Secondly,
this 1:10 scale is easy to do in your head.
|
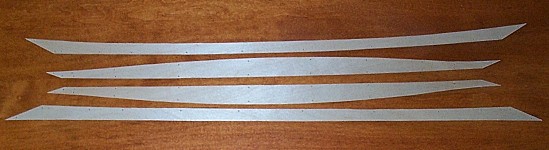 |
| The material used is birch modeler's plywood, 12x24x1/32, 3plys. I
taped the sheet to the drafting table, and used the offset table to lay
out the points. Next, I cut out the panels with an x-acto knife. I drilled
some holes, and sanded the edges so that the pairs of panels match. Also,
I cut out the bulkheads and building frames (not pictured). |
| |
| |
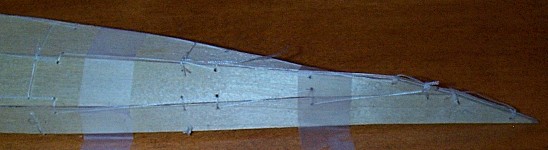 |
| I used a sewing needle and ordinary polyester thread to stitch together
the panels. Next, I stitched in the bulkheads and building forms. I did
not attach the forms to a strongback, I just eyeballed it for straightness. |
| |
| |
 |
| Epoxy thickened with colloidal silica was used for internal fillets,
applied with a syringe. Later, the threads were cut or sanded off, and
epoxy was applied to the entire hull, inside and out. |
| |
| |
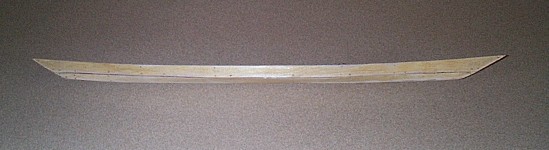 |
| Another view of the hull; bow is to the right. On the model, the keel
is unfair (flat to concave) in the area right beneath the cockpit. |
What the model has shown me:
As I expected, the hardest areas to stitch together will be the bow
and stern chines.
One bulkhead ended up 0.1 inches too high. Sure enough, I made a mistake
on the plans, drawing the bulkhead correctly, but writing a number 1 inch
too high.
I must keep an eye on the fairness during assembly, and correct the
offset table.
I like the looks of this little boat. Someday, I will put a deck on,
and finish it, but not today! I just purchased the okoume plywood to build
the real thing.